Chocolate Covered Strawberries with Shatter-Proof Shell

- Time: Active 30 minutes, Passive 30 minutes, Total 60 minutes
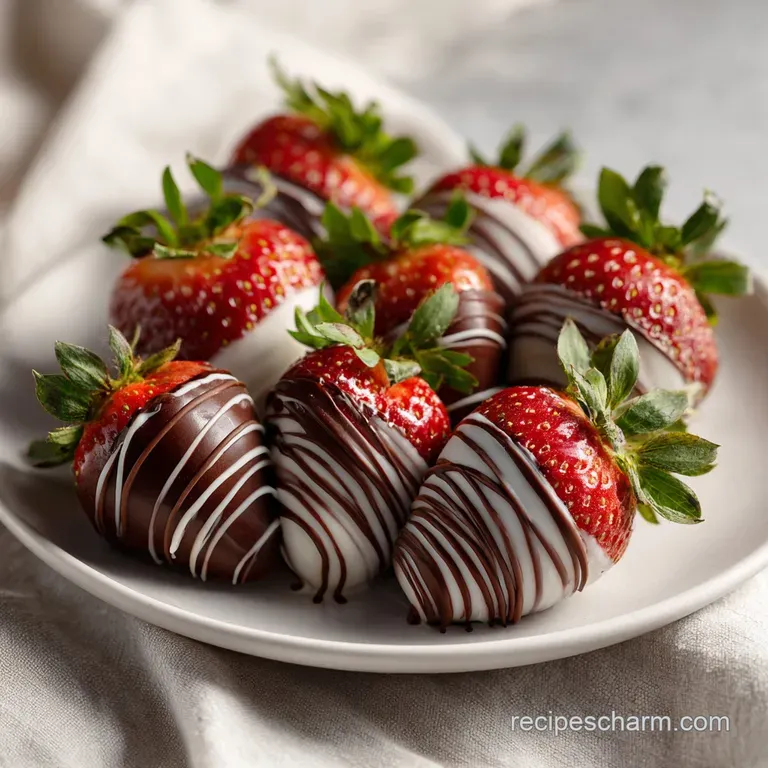
- Flavor/Texture Hook: Velvety dark chocolate with a crisp, shatter prone shell
- Perfect for: Mother's Day, anniversaries, or stunning edible gifts
- Creating the Mothers Day Chocolate Covered Strawberries Bouquet
- The Secret to the Snap
- Component Analysis and Selection
- Curated Shopping List Essentials
- Step by Step Assembly Guide
- Solving Common Dipping Disasters
- Guidelines for Scaling This Recipe
- Presentation Styles and Plating
- Debunking Dipping Myths
- Smart Storage and Maintenance
- Vibrant Pairing and Presentation
- Recipe FAQs
- 📝 Recipe Card
Creating the Mothers Day Chocolate Covered Strawberries Bouquet
There’s nothing quite like the scent of melted dark chocolate swirling through a kitchen, especially when it hits the tart, floral aroma of a fresh flat of berries. I remember my first attempt at a Mothers Day Chocolate Covered Strawberries Bouquet; I was so rushed I didn't let the berries dry properly.
Within twenty minutes, the chocolate was sliding off like a sad, melting ice cream cone. It was a disaster, but it taught me the most important rule of dipping fruit: moisture is the enemy.
Now, I’ve got this down to a science. When you get that "shatter" from the first bite and the juice of the berry hits the velvety chocolate, it’s pure magic. This isn't just a snack; it's a structural masterpiece that looks like it walked out of a high end boutique. If you're looking for something to pair with these for a full dessert spread, these Red Velvet Cupcakes recipe add that extra pop of color and decadence.
We’re going to focus on getting that Instagram worthy finish. No streaks, no dull spots, just pure, glossy perfection. Whether you’re making this for a gift or just to treat yourself, the technique is everything.
Let's get into the mechanics of how to make a chocolate covered strawberry bouquet that actually stays upright and looks stunning.
The Secret to the Snap
Lipid Stabilization: Adding coconut oil to the melting wafers lowers the viscosity, creating a thinner, more even coating that hardens with a professional sheen. This ensures the chocolate doesn't "bloom" or turn grey as it sets at room temperature.
Surface Tension Management: Dry strawberries allow the chocolate to grip the skin on a molecular level, preventing the "sweating" that causes the shell to detach.
| Method | Time | Texture | Best For |
|---|---|---|---|
| Fast Dip | 15 minutes | Thick, slightly soft | Last minute snacks |
| Classic Temper | 45 minutes | Thin, crisp snap | Gifting and bouquets |
| Double Coat | 60 minutes | Heavy, indulgent | Large, hardy berries |
This comparison shows that while the fast dip is tempting, the classic approach gives you that "shatter" effect that makes this Mothers Day Chocolate Covered Strawberries Bouquet stand out. If you're looking for a lighter, everyday treat, you might even enjoy a simple Chia Pudding Recipe alongside your fruit.
Component Analysis and Selection
| Ingredient | Science Role | Pro Secret |
|---|---|---|
| Dark Chocolate | Structural base | Wafers melt more evenly than broken bars |
| Refined Coconut Oil | Thinning agent | Keeps the coating fluid for longer dipping windows |
| Fresh Strawberries | Moisture source | Room temperature berries prevent chocolate from "shocking" |
Curated Shopping List Essentials
- 2 lbs strawberries: Choose berries with vibrant green leaves and no soft spots. Why this? Firm berries provide the necessary structural support for skewers.
- 16 oz dark chocolate melting wafers: Look for high-quality brands like Ghirardelli. Why this? They contain enough cocoa butter to set without tempering.
- 4 oz white chocolate wafers: For the decorative drizzle and contrast.
- 1 tbsp refined coconut oil: This must be refined so it doesn't add a coconut flavor.
- 18 bamboo skewers: The skeleton of your bouquet.
- 1 block floral foam: To hold the arrangement in place inside the vase.
- 1 decorative vase: Choose one with a wide enough base to prevent tipping.
For the dark chocolate, you can substitute it with semi sweet chocolate chips plus an extra teaspoon of oil, though it will be slightly softer. If you can't find floral foam, a head of cabbage wrapped in foil works as a heavy, stable base for the skewers!
step-by-step Assembly Guide
- Wash and dry 2 lbs strawberries. Note: They must be bone dry, or the chocolate will seize.
- Melt 16 oz dark chocolate wafers. Melt in 30 second intervals with 1 tbsp coconut oil until silky and completely smooth.
- Insert bamboo skewers into the stem end. Note: Only go about halfway through the berry so it doesn't poke through the top.
- Dip each berry into the dark chocolate. Note: Swirl gently to coat, then tap the skewer on the bowl rim to remove excess.
- Place skewers into the floral foam. Allow them to stand upright until the surface is matte and firm.
- Melt 4 oz white chocolate wafers. Note: Use a lower heat, as white chocolate burns much faster than dark.
- Drizzle the white chocolate over the berries. Use a spoon or a piping bag until a delicate web pattern forms.
- Prepare the decorative vase with foam. Note: Ensure the foam is wedged tightly so it doesn't wiggle.
- Arrange the skewers at varying heights. Place the largest berries in the center until the bouquet looks lush and full.
Chef's Tip: If your chocolate starts to thicken while dipping, pop it back in the microwave for exactly 10 seconds. Don't overdo it, or you'll lose that glossy finish.
Solving Common Dipping Disasters
The "Sweaty" Strawberry Syndrome
If you take berries straight from the fridge and dip them into hot chocolate, condensation forms under the shell. This moisture eventually leaks out, making the chocolate feel slimy. Always let your fruit sit at room temperature for at least 2 hours before you start the process.
Chocolate Sliding Off Fruit
This usually happens because the berries weren't dried properly after washing. Even a tiny droplet of water acts as a lubricant between the skin and the chocolate. Use a paper towel to pat each berry individually, paying close attention to the area under the green leaves.
| Problem | Root Cause | Solution |
|---|---|---|
| Lumpy coating | Chocolate overheated | Stir in 1 tsp room temp oil immediately |
| Chocolate won't set | Too much oil added | Add more wafers to the mix to thicken |
| Berries falling off skewers | Skewers are too thin | Use two skewers per large berry for support |
Common Mistakes Checklist
- ✓ Never skip the drying phase; use a fan if you're in a humid environment.
- ✓ Avoid using "wet" or macerated fruit for dipping.
- ✓ Don't use a bowl that is too wide; a narrow, deep cup makes dipping easier.
- ✓ Ensure the floral foam is anchored; a top heavy bouquet will tip the vase.
- ✓ Keep the chocolate temperature around 90°F for the best flow.
Guidelines for Scaling This Recipe
When you want to scale down for a solo treat, it's easy to just halve everything. However, when scaling up for a party, you have to be careful with the chocolate. If you double the recipe to 4 lbs of berries, don't melt all 32 oz of chocolate at once.
It will cool down and thicken before you reach the end of your batch. Work in 16 oz increments to keep the dip fluid.
For large events, the salt and any additional spices (like a pinch of cinnamon) should only be increased by 1.5x rather than doubled to prevent overpowering the fruit. If you are using a very large vase, increase the weight at the bottom of the container with glass pebbles or sand to ensure the Covered Strawberries Bouquet doesn't fall over.
Presentation Styles and Plating
| Level | Presentation Style | Tweak |
|---|---|---|
| Simple | Flat Platter | Line with parchment; no skewers needed |
| Polished | Gift Box | Use mini cupcake liners to hold each berry |
| Restaurant | Vertical Bouquet | Use the vase and foam for height and drama |
If you want a classic look, stick to the platter. If you want that "wow" factor for Mother's Day, the vertical arrangement is the only way to go. Just remember that the "Restaurant" level requires the most patience during the setting phase.
Debunking Dipping Myths
One huge misconception is that you need to use a double boiler to melt chocolate. While it's traditional, a microwave is actually safer for beginners because there is zero risk of steam (water) getting into the bowl and seizing the entire batch. Just keep the intervals short and stir constantly.
Another myth is that you should freeze the berries before dipping to make the chocolate set faster. This is a recipe for disaster. As the berry thaws inside the chocolate, it expands and releases juice, which will crack the shell and create a watery mess. Room temperature is your best friend here.
Smart Storage and Maintenance
Storage: These are best eaten the same day, but you can keep them in the fridge for up to 24 hours. Put them in a single layer in a container lined with paper towels to absorb any condensation.
Never freeze chocolate covered fruit; the texture of the strawberry becomes mushy and the chocolate will white out from the cold.
Zero Waste: Don't throw away the leftover chocolate! Pour it onto a piece of parchment paper, sprinkle it with some crushed nuts or leftover strawberry bits, and let it harden into a "bark." You can also save the strawberry hulls (the green tops) to infuse into water or vinegar for a subtle fruity flavor.
For more Mother's Day strawberries ideas, you can even chop up any slightly bruised berries and stir them into a morning yogurt.
Vibrant Pairing and Presentation
This Covered Strawberries Bouquet is the star of the show, but it loves company. I usually serve this alongside some sparkling cider or a crisp Prosecco. The acidity of the wine cuts through the richness of the dark chocolate beautifully.
If you're doing a full brunch, these pair perfectly with a light salad or even some savory finger sandwiches. The visual of the Chocolate Covered Strawberries standing tall in a vase provides a fantastic vertical element to any table spread. Just make sure to keep the arrangement out of direct sunlight, or you'll have a very shiny, very melty mess on your hands! For another festive touch, you might consider making a Valentines Day Heart recipe if you're celebrating a different romantic occasion.

Recipe FAQs
Do I need to temper the chocolate for a crisp shell?
No, use melting wafers or add coconut oil. high-quality melting wafers contain enough cocoa butter solids to set hard without traditional tempering.
What is the primary reason chocolate slides off the strawberry?
The berry surface was not completely dry. Any residual moisture acts as a lubricant between the fruit skin and the molten chocolate, causing detachment.
How much coconut oil should I add to the chocolate?
Add 1 tablespoon of refined coconut oil per 16 ounces of wafers. This lowers the viscosity, creating a thinner coat that hardens with a professional sheen.
Is it true I must use strawberries directly from the refrigerator?
False. Using cold berries causes condensation, leading to "sweaty" chocolate shells that become slimy as the fruit warms up.
How long can I safely store finished chocolate covered strawberries?
Best eaten the same day, but safe for up to 24 hours in the fridge. Store them in a single layer with paper towels to absorb any forming condensation.
What is the best way to prevent white chocolate from scorching when melting?
Melt white chocolate at 50% power in 20-second intervals. Stir thoroughly between each interval because white chocolate burns much faster than dark chocolate.
How do I ensure the chocolate coating sets up fast enough for arranging?
Place dipped berries upright immediately onto floral foam. This allows the coating to set vertically without touching a surface, leading to a quick setting matte finish.
Chocolate Covered Strawberries Guide

Ingredients:
Instructions:
Nutrition Facts:
| Calories | 578 kcal |
|---|---|
| Protein | 5.6 g |
| Fat | 32.4 g |
| Carbs | 67.9 g |
| Fiber | 7.8 g |
| Sugar | 53.2 g |
| Sodium | 48 mg |
