Christmas Tree Wreath Meringue Cookies: Crispy and Festive
- Time: Active 25 minutes, Passive 120 minutes, Total 145 minutes
- Flavor/Texture Hook: Shatteringly crisp exterior with a light, airy vanilla finish
- Perfect for: Holiday cookie swaps, aesthetic dessert boards, and impressive gifting
- Achieve Festive Perfection with Christmas Tree Wreath Meringue Cookies
- The Secret Behind the Ideal Shattering Crunch
- A Deep Dive into Meringue Component Analysis
- Essential Equipment for Flawless Holiday Baking
- Detailed Steps to Create Elegant Piping Masterpieces
- Fixing Texture Issues and Avoiding Common Mistakes
- Creative Flavor Infusions and Holiday Variations
- Scaling Your Holiday Batch
- Debunking Meringue Misconceptions
- Storing Your Delicate Treats for Lasting Crispness
- Styling Your Wreaths for an Instagram Worthy Display
- Recipe FAQs
- 📝 Recipe Card
Achieve Festive Perfection with Christmas Tree Wreath Meringue Cookies
There is a very specific sound that defines a successful holiday baking session in my kitchen: the light, hollow "tink" of a perfectly dried meringue hitting a cooling rack. I remember my first attempt at these christmas tree wreath meringue cookies; I was so focused on the vibrant forest green color that I rushed the whipping process.
I ended up with what looked like sad, melting green puddles rather than the regal, sharp edged wreaths I’d envisioned for my Instagram feed. It was a humbling lesson in the patience required for egg white stability.
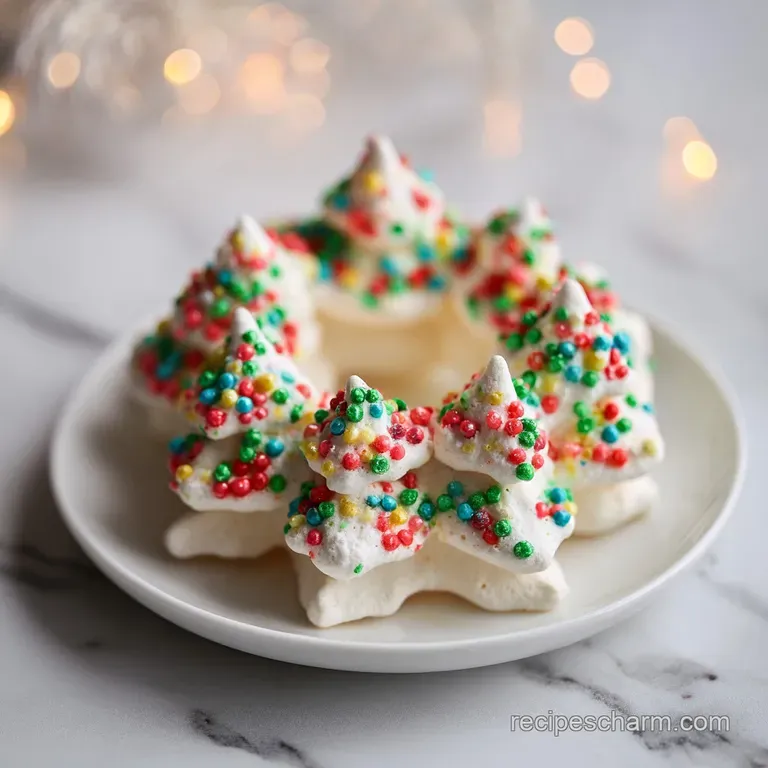
Now, when I pull a tray of these out of the oven, they look like something plucked straight from a boutique confectionery window. The forest green gel provides a deep, moody backdrop for the shimmering gold stars and colorful nonpareils.
They are viral worthy not just because of their shape, but because of that ethereal, light as-air texture that only a slow bake can achieve. Trust me, once you master the "stiff peak" stage, you’ll be looking for any excuse to pipe these festive wreaths for every winter gathering.
This recipe isn't about rushing to the finish line. It's about the transformation of humble egg whites into structural art. We are aiming for a finish that is matte, vibrant, and completely bone dry. If you've ever struggled with meringues that feel sticky or "weep" sugar syrup, we are going to fix that today.
By the time we’re done, you’ll have 27 gorgeous wreaths that look far more complicated to make than they actually are. Let’s get the whisking started.
The Secret Behind the Ideal Shattering Crunch
Protein Scaffolding: Egg whites are mostly water and protein; whipping them unfolds these proteins, which then bond together to trap air bubbles in a stable network.
Acidic Stabilization: The cream of tartar lowers the pH of the egg whites, which prevents the proteins from over bonding and collapsing into a grainy, watery mess.
Sugar Desiccation: Adding superfine sugar slowly allows it to dissolve into the water of the egg whites, creating a thick syrup that coats the air bubbles and hardens into a crisp shell when baked.
Thermal Dehydration: Baking at a low 95°C (200°F) doesn't actually "cook" the egg in the traditional sense; it slowly evaporates every molecule of moisture to create that signature snap.
| Cook Method | Time | Texture | Best For |
|---|---|---|---|
| Standard Oven | 120 minutes | Shattering, crisp exterior | Most home kitchens |
| Convection/Fan | 100 minutes | Uniformly dry, very airy | Large batches/even drying |
| Dehydrator | 4-6 hours | Matte finish, zero browning | Maintaining ultra vivid colors |
Choosing the right method depends on your equipment, but the standard oven is the most accessible way to reach that "shatter" point. The key is the low and slow approach. If the oven is even 10 degrees too hot, the sugar will caramelize and turn your vibrant green wreaths into a muddy olive brown.
We want to avoid that at all costs to keep the aesthetic on point.
A Deep Dive into Meringue Component Analysis
| Ingredient | Science Role | Pro Secret |
|---|---|---|
| Egg Whites (120g) | Primary structure and volume | Use room temperature whites; they stretch further and hold more air than cold ones. |
| Superfine Sugar (200g) | Weight and crispness | If you only have granulated sugar, pulse it in a blender for 30 seconds to make it superfine. |
| Cream of Tartar (1/2 tsp) | Protein stabilizer | Never skip this; it’s the insurance policy that keeps your wreaths from deflating. |
| Forest Green Gel | Concentrated pigment | Always use gel, never liquid; liquid coloring adds moisture that can ruin the meringue's stability. |
Using the right components is the difference between a professional looking cookie and a kitchen disaster. I once tried to use liquid food coloring because it was all I had, and the extra water caused the peaks to sag almost instantly. Stick to the gel!
It provides that stunning, deep color without compromising the integrity of your piped shapes.
Essential Equipment for Flawless Holiday Baking
To get those sharp, defined ridges on your wreaths, your tools need to be as precise as your technique. The most important rule of meringue is that fat is the enemy. Even a microscopic speck of oil or egg yolk in your bowl will prevent the egg whites from foaming.
I always use a stainless steel or glass bowl because plastic can hold onto hidden grease films.
Before you even crack an egg, take a piece of paper towel dipped in lemon juice or white vinegar and wipe down your whisk and the inside of your mixing bowl. This ensures a pristine, grease free environment. You’ll also need a large piping bag and a classic open star tip, like the Wilton 1M.
This specific tip creates those beautiful, deep grooves that make the cookies look like actual evergreen branches.
If you are planning a larger holiday spread, these wreaths look incredible next to a batch of Chocolate Chunk Cookies. The contrast between the dark, fudgy chocolate and the crisp, light green meringue is a visual win for any dessert platter. Having a stand mixer like a KitchenAid makes the long whipping process much easier, but a hand mixer works too if you have the arm strength!
Detailed Steps to Create Elegant Piping Masterpieces
- Preheat your oven to 95°C (200°F). Line two baking sheets with silicone mats or high-quality parchment paper.
- Wipe your stainless steel mixing bowl and whisk attachment with lemon juice to ensure they are completely grease free. Note: This is the most critical step for volume.
- Place the 120g of room temperature egg whites into the bowl and whip on low speed until they are frothy and look like bubble bath foam.
- Add the 1/2 tsp cream of tartar and 1/4 tsp salt. Increase the speed to medium high and whip until soft peaks form that gently curl over when the whisk is lifted.
- With the mixer running, add the 200g of superfine sugar one tablespoon at a time. Note: Adding sugar too fast will collapse the air bubbles.
- Continue whipping on high speed for about 5-7 minutes until the meringue is stiff, glossy, and doesn't feel grainy when rubbed between your fingers.
- Fold in the 1 tsp clear vanilla extract and 1 tsp forest green gel food coloring using a rubber spatula until the color is uniform and vivid.
- Fit your piping bag with an open star tip and pipe 2 inch circles. To get the "wreath" look, pipe in a continuous circle, slightly overlapping the start and end points.
- Immediately press one gold star sprinkle at the top of each wreath and scatter the nonpareils over the "branches" until they look like decorated trees.
- Bake for 120 minutes at 95°C (200°F). Turn off the oven and let them sit inside for at least 60 minutes until they are completely dry and pull away from the mat easily.
The cooling phase is just as important as the baking phase. If you pull them out into a cold kitchen too quickly, the sudden temperature change can cause tiny cracks to form on the surface.
By letting them cool in the residual heat of the oven, you ensure a smooth, professional finish that will hold up during storage or shipping.
Fixing Texture Issues and Avoiding Common Mistakes

Why Your Meringue is Soft or Sticky
If your wreaths feel tacky or soft even after two hours, humidity is likely the culprit. Sugar is hygroscopic, meaning it pulls moisture from the air. On a rainy day, meringues can absorb enough water to lose their crispness.
You can try "re drying" them in a 95°C (200°F) oven for another 20 minutes to see if they crisp back up.
Dealing with Grainy Texture
If you can still feel sugar granules in the meringue before piping, it means the sugar didn't dissolve properly. This usually happens if the sugar is added too quickly or if the sugar crystals are too large. This can lead to "weeping" later, where little beads of syrup form on the surface of the baked cookie.
Always use superfine sugar and take your time during the addition phase.
| Problem | Root Cause | Solution |
|---|---|---|
| Yellowing | Oven temperature too high | Reduce heat to 95°C and use an oven thermometer to verify. |
| Deflating | Grease in bowl or yolk in whites | Wipe everything with lemon juice; ensure no yolk contamination. |
| Cracking | Cooled too quickly | Leave cookies in the oven with the door closed for 1-2 hours after baking. |
A little trick I learned the hard way: if you get a tiny speck of yolk in your whites, don't try to fish it out with your finger. Use an empty eggshell half to scoop it out; the shell acts like a magnet for the yolk and is much more effective than your hands.
Common Mistakes Checklist
- ✓ Never use a plastic bowl; use stainless steel or glass to avoid hidden grease.
- ✓ Ensure your egg whites are at room temperature for maximum volume.
- ✓ Add sugar very slowly one tablespoon at a time is the golden rule.
- ✓ Check that your food coloring is "gel" or "paste" based, never liquid.
- ✓ Avoid making meringues on very humid or rainy days if possible.
- ✓ Don't open the oven door during the first 90 minutes of baking.
Creative Flavor Infusions and Holiday Variations
While clear vanilla is the standard for keeping that forest green color bright, you can play with other clear extracts. Peppermint is a classic choice for the holidays; just ensure it is an oil free extract so it doesn't deflate your peaks.
If you want a more sophisticated flavor, a tiny drop of almond extract adds a "wedding cake" vibe that is absolutely stunning.
For a more decadent version, you can dip the bottoms of the cooled wreaths in melted dark chocolate and then into crushed candy canes. This adds a beautiful "base" to the tree and provides a bitter contrast to the sweet meringue.
Just make sure the cookies are completely cool before dipping, or the heat from the chocolate might soften the meringue.
If you're building a massive holiday dessert board, these wreaths pair beautifully with other classics. I often plate them alongside Classic Peanut Butter Cookies for a mix of textures. The saltiness of the peanut butter balances the pure sugar hit of the meringue perfectly.
Scaling Your Holiday Batch
When scaling this recipe, keep in mind that the whisking time will increase as the volume of egg whites grows. If you're doubling the recipe to 54 servings, don't just double the salt and cream of tartar; use about 1.5x the amount to avoid an overly acidic taste.
| Servings | Ingredient Adjustments | Pan Size | Cook Time |
|---|---|---|---|
| 14 Wreaths | 2 whites, 100g sugar | 1 Baking Sheet | 120 minutes |
| 27 Wreaths | 4 whites, 200g sugar | 2 Baking Sheets | 120 minutes |
| 54 Wreaths | 8 whites, 400g sugar | 4 Baking Sheets | 140 minutes |
When baking multiple sheets at once, you may need to increase the bake time by about 20 minutes and rotate the pans halfway through to ensure even drying. Ensure there is enough space between the racks for the air to circulate, as meringues rely on that dry air to set properly.
Debunking Meringue Misconceptions
One common myth is that you need to add a pinch of salt to make egg whites whip faster. In reality, salt can actually decrease the stability of the foam over time. It’s better to add the salt toward the end of the whipping process or rely on the cream of tartar for structural support.
Another misconception is that you can’t over whip meringue. You actually can! If you whip the egg whites for too long before adding the sugar, the protein bonds become too tight and start to squeeze out the water, leading to a "curdled" or dry appearance.
Once you hit stiff peaks and the sugar is dissolved, stop the mixer immediately.
Storing Your Delicate Treats for Lasting Crispness
Storing these christmas tree wreath meringue cookies correctly is the difference between a week of enjoyment and a sticky mess by tomorrow morning. Because they are basically pure sugar, they will soak up any moisture in the air. Always store them in a strictly airtight container.
If you have those little silica gel packets that come in shoe boxes or dried seaweed, toss one (a clean, food safe one!) into the container to act as a desiccant.
- Room Temperature: Store in an airtight container for up to 2 weeks. Keep them away from the stove or dishwasher where steam is common.
- Freezing: Meringues actually freeze surprisingly well. Place them in a single layer in a freezer safe container for up to 2 months. When ready to eat, don't open the container until it has reached room temperature to prevent condensation from forming on the cookies.
- Zero Waste Tip: If you have leftover "plain" meringue that didn't make it into wreath shapes, pipe them into tiny "kisses" and bake them alongside. These can be crushed up and folded into whipped cream with berries for a quick "Eton Mess" dessert the next day.
Styling Your Wreaths for an Instagram Worthy Display
Plating Level: Simple
Arrange the wreaths in a single layer on a white ceramic platter. The contrast between the forest green and the white plate makes the colors pop. This is perfect for a casual family gathering where the focus is on ease.
Plating Level: Polished
Place the wreaths on a wooden board interspersed with fresh rosemary sprigs and whole cranberries. Dust the entire board lightly with powdered sugar using a fine mesh sieve to create a "snow covered forest" effect. This adds texture and a professional touch to your presentation.
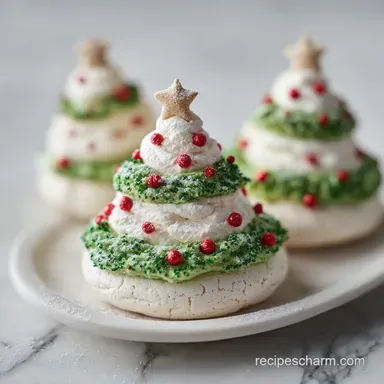
Plating Level: Restaurant
Create a vertical display. Using a bit of royal icing or melted white chocolate as "glue," stack three wreaths of slightly decreasing sizes to create a 3D tree. Place a gold star on the very top and serve on a slate board with a smear of raspberry coulis for a high end, plated dessert experience.
| Plating Level | Key Element | Visual Impact |
|---|---|---|
| Simple | White platter | Clean and classic |
| Polished | Rosemary & "Snow" | Rustic and festive |
| Restaurant | 3D Stacking | Architectural and viral worthy |
Creating these christmas tree wreath meringue cookies is a labor of love that rewards you with the most stunning visual payoff. Whether you’re a seasoned baker or just looking to try something new this holiday season, the key is in the details the clean bowl, the slow sugar, and the low oven.
Once you see that first batch of perfectly green, crisp wreaths, you'll understand exactly why I'm so obsessed with this recipe. Happy holiday baking!

Recipe FAQs
Is it true I can use a plastic bowl to whip the egg whites?
No, this is a common misconception. Plastic bowls often retain a thin layer of grease that prevents egg whites from whipping to stiff peaks, so always use stainless steel or glass wiped with lemon juice or vinegar.
How to ensure the meringue reaches the correct consistency?
Add the superfine sugar one tablespoon at a time while the mixer is running on medium high speed. Continue whipping until you achieve stiff, glossy peaks and there is absolutely no graininess when you rub a bit of the mixture between your fingers.
Is it necessary to use gel food coloring instead of liquid?
Yes, gel food coloring is required. Liquid food coloring adds extra moisture that can destabilize the meringue structure and prevent the cookies from drying out properly.
How to prevent the wreaths from becoming soft or sticky?
Bake at 200°F for exactly 2 hours and let them cool inside the oven. Leaving the oven door closed while they cool for an additional 1-2 hours allows them to fully dehydrate, ensuring a perfectly crisp texture.
Is it okay to open the oven door while the cookies are baking?
No, keep the door closed for the first 90 minutes. Opening the oven door introduces cold air and humidity, which will cause your meringue wreaths to collapse or lose their crispness.
How to store the meringues to keep them crisp for two weeks?
Place them in a strictly airtight container immediately after they have fully cooled. If the air is humid, adding a clean, food safe silica gel packet to the container will help absorb moisture and maintain their crunch.
Is it true that meringues can be made on rainy or humid days?
No, this is a common misconception. High humidity is the enemy of meringue; the sugar will absorb moisture from the air, making your cookies sticky instead of light and crisp.
Christmas Tree Meringue Wreaths
Ingredients:
Instructions:
Nutrition Facts:
| Calories | 35 calories |
|---|---|
| Protein | 0.5 g |
| Fat | 0 g |
| Carbs | 8.4 g |
| Fiber | 0 g |
| Sugar | 8.2 g |
| Sodium | 23 mg |
