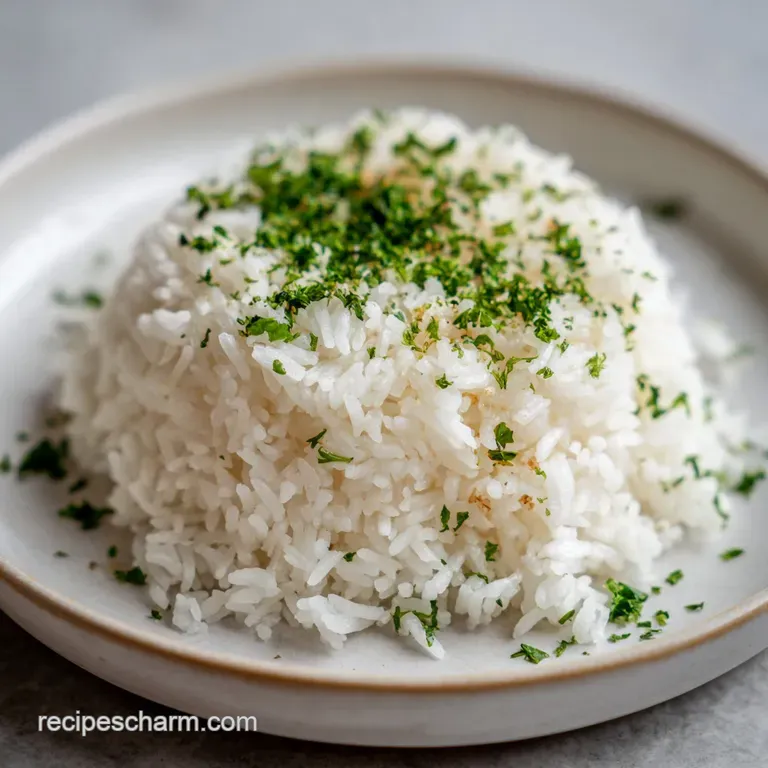
Steamed Rice Recipe: Fluffy and Tender Grains
- Time: Active 5 mins, Passive 18 mins, Total 23 mins
- Flavor/Texture Hook: Light, airy grains with a clean, nutty finish
- Perfect for: Hearty family dinners, budget-friendly meal prep, and beginners
- Achieving Fluffy Grains with This Steamed Rice Recipe
- Science Behind Perfectly Non Sticky Grains
- Consistent Timing for Family Dinner Results
- Pantry Staples and Smart Value Substitutes
- Basic Tools for Minimal Cleanup Cooking
- Foolproof Steps for Light Airy Rice
- Fixing Common Mistakes and Sogginess Issues
- Hearty Ways to Add Big Flavor
- Preservation Secrets and Storage Tips
- Hearty Serving Ideas for Family Dinners
- Recipe FAQs
- 📝 Recipe Card
Achieving Fluffy Grains with This Steamed Rice Recipe
Imagine the heavy, warm cloud of steam that hits your face when you lift a pot lid. It smells clean, slightly sweet, and promising. For years, I struggled with the "rice lottery." Sometimes it was a soggy mess, other times it had a crunch that could break a tooth.
I remember one specific family dinner where I tried to serve a beautiful curry, but the rice was so gummy we basically had to slice it with a knife. It was humiliating, but it forced me to stop guessing and start learning what actually happens inside that pot.
We've all been there, staring at a pot of white mush and wondering where it went wrong. This steamed rice recipe isn't about fancy gadgets or expensive imported grains. It's about a reliable, repeatable process that respects the starch.
We are going for that restaurant style finish where you can see every individual grain standing tall. It's the ultimate side dish that fills the belly without draining the wallet, making it a cornerstone of our family dinner rotation.
Trust me, once you see those little steam holes (I call them "volcanoes") forming in the rice bed, you'll know you've nailed it. We are moving away from the guesswork and focusing on a method that works every single time, whether you are using a scratched up old saucepan or a high end cooker.
Let's get into why this method is a total win for your kitchen.
Science Behind Perfectly Non Sticky Grains
- Amylose Management: Rinsing the rice physically strips away the loose surface starch that otherwise turns into "glue" during the boil.
- Starch Gelatinization: At exactly 100°C, the rice granules absorb water and expand, but the low simmer phase ensures they don't burst and release excess starch.
- Vapor Pressure: Keeping the lid sealed creates a pressurized environment that drives moisture into the dense center of the long grain rice.
- The Osmosis of Grain Expansion: Salt in the water doesn't just add flavor; it helps regulate how the water penetrates the grain walls for a more even texture.
| Method | Total Time | Grain Texture | Best For |
|---|---|---|---|
| Stovetop | 23 mins | Distinct, firm grains | Quick weeknight meals |
| Rice Cooker | 25 mins | Soft, very uniform | Set it and forget it |
| Traditional Steamer | 45 mins | Velvety, plump | Dim sum style dishes |
Choosing the right method depends on how much attention you want to give the stove. For a busy family dinner, the stovetop method is surprisingly fast once you master the heat control. If you're multitasking with kids or work, the rice cooker is your best friend.
Consistent Timing for Family Dinner Results
| Cooking Phase | Duration | Visual Cue | Goal |
|---|---|---|---|
| Initial Boil | 3 minutes | Large, rolling bubbles | Heat the core |
| Gentle Simmer | 12 minutes | Small steam vents appear | Even hydration |
| Steam Rest | 5-10 mins | No visible liquid | Structure setting |
Giving the rice that final rest is the most skipped step, but it is actually where the magic happens. During these 5 minutes, the moisture redistributes so the bottom isn't soggy while the top is dry. It's the difference between "okay" rice and "brilliant" rice.
For another hearty staple that rounds out a meal, you might like our gluten-free Bread recipe which also relies on precise hydration.
Pantry Staples and Smart Value Substitutes
- 2 cups Long grain white rice: Why this? It has high amylose, which keeps grains separate rather than sticky.
- 3 cups Filtered water: Why this? Removes chlorine tastes that can ruin the delicate aroma of the grain.
- 0.5 tsp Sea salt: Why this? Enhances the natural nuttiness without making it taste "salty."
- 1 tsp Neutral oil: Why this? Lightly coats the grains to prevent them from fusing together.
| Original Ingredient | Substitute | Why It Works |
|---|---|---|
| Filtered water | Tap water | Completely fine for budget conscious cooking; boil first if it smells of chlorine. |
| Neutral oil | Butter | Adds a rich, velvety mouthfeel. Note: Will slightly change the aroma. |
| Long grain rice | Basmati rice | Similar cook time but adds a floral scent. |
Using tap water is a great way to save a few cents, and honestly, in most places, the difference is negligible once the rice is seasoned. If you really want to stretch the flavor, swapping a tiny bit of the water for leftover veggie scraps broth is a solid move.
Basic Tools for Minimal Cleanup Cooking

You don't need a pantry full of gadgets. A heavy bottomed pot is the most important piece of gear here. Thin pots have "hot spots" that will scorched the bottom grains before the top ones are even warm. If you have a cast iron pot or a thick stainless steel saucepan, use it.
A fine mesh strainer is also a lifesaver. Rinsing rice in the pot itself is a pain and you usually lose half the grains down the sink. A 15cm strainer makes the rinse fast and efficient. Finally,, a fork is better than a spoon for fluffing.
A spoon mashes the grains, while a fork slides between them to let the steam escape.
Foolproof Steps for Light Airy Rice
- Rinse the rice. Place your 2 cups long grain white rice in a strainer and run cold water over it until the water runs clear and no longer milky. Note: This removes the surface starch that causes clumping.
- Combine ingredients. Add the rinsed rice, 3 cups filtered water, 0.5 tsp sea salt, and 1 tsp neutral oil into your heavy bottomed pot.
- Bring to boil. Set the heat to medium high and wait until large bubbles break the surface and the water sizzles.
- Reduce heat. Turn the flame to the lowest possible setting. You want a whisper of a simmer, not a roar.
- Seal the pot. Place a tight fitting lid on the pot. Note: If your lid is loose, place a clean kitchen towel between the pot and the lid to trap steam.
- Simmer steady. Let it cook for 15-18 minutes until the water is fully absorbed and the surface looks pitted with small holes.
- Check doneness. Quickly peek and tilt the pot; if you see liquid pooling at the edge, give it 2 more minutes.
- Rest the grains. Remove from heat and keep the lid on for 5 minutes. Don't touch it! This allows the grains to firm up.
- Fluff gently. Use a fork to rake through the rice until the grains separate and the texture looks light and airy.
To Ensure Non Sticky Grains
The biggest mistake is stirring. Once you put that lid on, the rice needs a stable environment. Stirring breaks the grains and releases starch, which instantly turns your pot into a sticky paste. Just walk away and let the steam do the work.
Phase 2: The Rapid Boil
Make sure the water is actually boiling before you drop the heat. If you start the timer too early, the rice sits in lukewarm water and gets mushy. You want that initial thermal shock to start the outer layer of the grain cooking immediately.
Alternate Method: Rice Cooker
If using a machine, follow the same 2:3 ratio unless your manual specifies otherwise. Add the oil and salt directly into the bowl. The machine will handle the timing, but the 5 minute rest after it clicks to "warm" is still mandatory for the best result.
Fixing Common Mistakes and Sogginess Issues
Why Your Rice Is Mushy
This usually happens because of an incorrect water ratio or because the rice wasn't drained well after rinsing. If you find your rice is too wet, don't keep boiling it.
| Problem | Root Cause | Solution |
|---|---|---|
| Grains are sticking | Improper rinsing | Rinse until water is clear next time; fluff with oil now. |
| Hard, crunchy centers | Not enough water | Add 2 tbsp boiling water and steam for 5 more mins. |
| Scorched bottom | Heat was too high | Use a heat diffuser or a heavier pot. |
Sometimes, the "mush" is just on the top. If the bottom is fine, you can actually spread the rice out on a baking sheet and pop it in a warm oven for 5 minutes to dry it out. It's a lifesaver when company is coming over.
Common Mistakes Checklist
- ✓ Never skip the rinse; that cloudy water is the enemy of fluffiness.
- ✓ Use a pot with a heavy base to prevent those dreaded black burnt spots.
- ✓ Resist the urge to lift the lid; every time you peek, you lose the pressure needed to cook the grain centers.
- ✓ Always use a fork, never a spoon, to fluff the final product.
- ✓ Ensure the heat is on the lowest possible setting during the simmer phase.
Hearty Ways to Add Big Flavor
While plain rice is a classic, you can easily turn this into a Dim Sum Steamed Rice Recipe by adding a few drops of sesame oil and a pinch of white pepper at the end.
For a more savory twist, I often use the leftover water from steaming vegetables or even a bouillon cube to give the grains a golden hue and a deeper profile.
If you are looking for a complete meal, this rice pairs beautifully with a Chicken and Peppers recipe. The juices from the peppers soak into the fluffy rice, creating a flavor packed experience that feels much more expensive than it actually is. If you're watching your carb intake but still want that "noodle" feel on the side, you could even look into a Shirataki Noodles Recipe for your next meal prep session.
| Add in | When to Add | Flavor Impact |
|---|---|---|
| Garlic Powder | Before boiling | Subtle, savory base |
| Fresh Cilantro | After fluffing | Bright, zesty finish |
| Toasted Sesame | After fluffing | Nutty crunch |
Preservation Secrets and Storage Tips
Storage: Store leftover rice in an airtight container in the fridge for up to 4 days. The grains will naturally harden as they chill, which is actually exactly what you want if you plan on making fried rice the next day.
Cold rice fries up much better than fresh rice because the surface is dry and won't clump in the pan.
Freezing: You can freeze rice! I like to portion it into freezer bags, flatten them out, and store them for up to 3 months. To reheat, just add a teaspoon of water and microwave it covered. The water creates a "mini steam" effect that restores the velvety texture.
Zero Waste: Don't toss the "rice crust" at the bottom if it's not burnt. In many cultures, that crunchy bit is considered a treat. You can also throw leftover rice into soups to thicken them up without needing extra flour or cream. It’s a great way to make a simple broth feel much more hearty.
Hearty Serving Ideas for Family Dinners
Serving rice family style in a large, warm bowl is the way to go. I always put a small pat of butter on top right before bringing it to the table; it melts down through the layers and adds a beautiful sheen.
This is the ultimate "fill them-up" side dish that keeps the grocery bill low while making sure no one leaves the table hungry.
For a vibrant presentation, garnish with some sliced green onions or a sprinkle of paprika. It takes two seconds but makes the dish look intentional rather than just an afterthought.
Whether you are serving it under a pile of beans, alongside a roast, or as the base for a stir fry, this rice is the reliable backbone of a good home cooked meal. Trust the process, keep that lid closed, and enjoy the fluffiest rice you've ever made in your own kitchen!
 : PIN FOR LATER")
Recipe FAQs
What is the best way to steam rice?
Use a heavy bottomed pot with a tight fitting lid. This traps the steam effectively, creating the necessary pressure to cook the grains evenly without sticking.
What is the ratio of water to rice for steamed rice?
The standard ratio is 1.5 parts water to 1 part long grain white rice (e.g., 3 cups water to 2 cups rice). Adjust slightly for different rice types, but always rinse the rice first to remove excess surface starch.
What can I put in steamed rice to make it taste better?
Add a teaspoon of neutral oil or a small pat of butter before cooking. This helps coat the grains, preventing them from sticking together and adding a subtle richness to the final texture.
What's the secret to fluffy steamed rice?
The secret is the mandatory resting period off the heat. After cooking for 15-18 minutes, let the rice sit, covered, for a minimum of 5 minutes so the internal moisture redistributes evenly.
How do I prevent my steamed rice from becoming sticky or gummy?
Rinse the rice thoroughly until the water runs clear before cooking. This physically removes the loose surface starch that gelatinizes into a sticky paste during the boil.
Can I cook steamed rice without a rice cooker?
Yes, the stovetop method is highly reliable when executed correctly. Bring the water and rice to a boil, immediately reduce heat to the lowest simmer setting, cover tightly, and steam for 15 minutes.
Is it true that lifting the lid while steaming ruins the texture?
Yes, frequently lifting the lid is detrimental to the final product. Every time you lift the lid, you release steam and drop the internal temperature, interrupting the gelatinization process and leading to unevenly cooked grains.
Fluffy Steamed Rice Recipe
Ingredients:
Instructions:
Nutrition Facts:
| Calories | 348 calories |
|---|---|
| Protein | 6.5 g |
| Fat | 1.8 g |
| Carbs | 74 g |
| Fiber | 1.2 g |
| Sugar | 0.1 g |
| Sodium | 275 mg |
