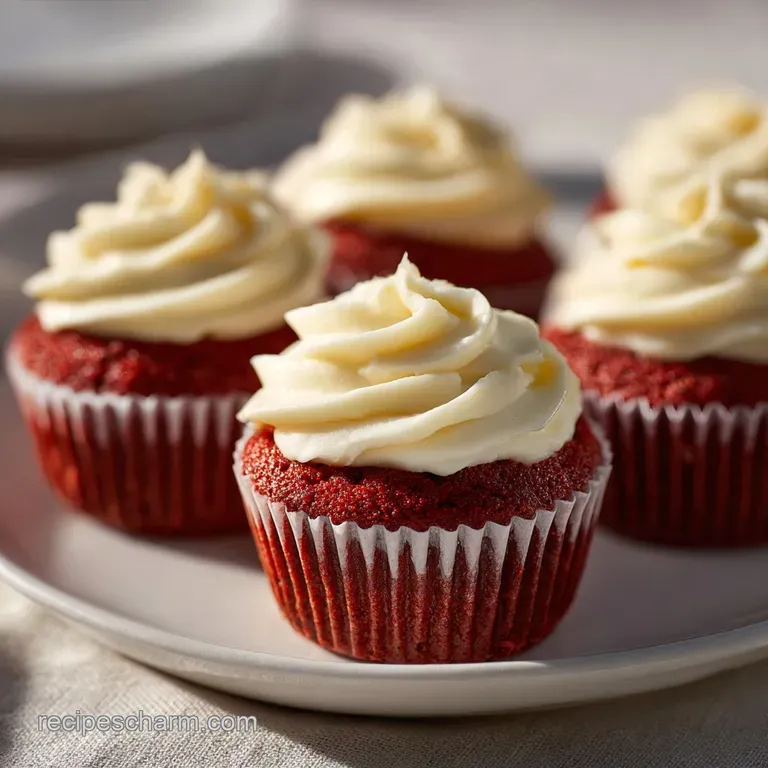
Soft Red Velvet Cupcakes with Cream Cheese Frosting
- Time: Active 15 minutes, Passive 20 minutes, Total 35 minutes
- Flavor/Texture Hook: Tangy, cocoa kissed batter paired with a velvety, satiny frosting.
- Perfect for: Anniversary celebrations, birthday parties, or a viral worthy weekend project.
- Making Red Velvet Cupcakes with Cream Cheese Frosting
- Science Behind This Velvet Crumb
- Key Specifications and Timing Guide
- Selecting the Right Ingredients
- Essential Tools for Professional Results
- Step-by-Step Method for Baking Success
- Resolving Common Baking Challenges
- Personalizing Your Red Velvet Creations
- Guidelines for Storage and Waste
- Elegant Presentation and Serving Ideas
- Myths About Red Velvet
- Recipe FAQs
- 📝 Recipe Card
Making Red Velvet Cupcakes with Cream Cheese Frosting
The first time I tried to bake these, my kitchen looked like a crime scene from a low budget horror movie. I had red gel food coloring on my nose, my white marble countertops, and somehow even on the ceiling. I was chasing that elusive "velvet" texture, but my cupcakes kept coming out like dry, maroon colored muffins.
It was frustrating, but it forced me to stop treating red velvet like a simple chocolate cake with dye; it's an entirely different beast of chemistry and balance.
Indulge in our recipe for a Soft and Moist Red Velvet Cupcake for Celebrations Delight with Cream Cheese Frosting, sure to be a memorable treat. After years of tweaking the ratio of vinegar to baking soda and testing every oil under the sun, I finally found the sweet spot.
We’re aiming for a crumb that almost dissolves on the tongue, balanced by the sharp, cooling tang of real cream cheese. This isn't just about the color; it's about that specific, delicate cocoa flavor that leaves you wanting another bite.
We are going to move past the amateur mistakes of over mixing and under coloring. You can expect a cupcake that stands tall with a flat enough top for professional piping, but soft enough to compress like a cloud when you bite down.
Whether you’re a seasoned baker or just starting out, these tips will ensure your kitchen stays (mostly) clean and your results stay Instagram worthy.
Science Behind This Velvet Crumb
The Anthocyanin Reaction: When natural cocoa powder meets acidic buttermilk and vinegar, it triggers a pH shift that reveals the hidden reddish pigments in the cocoa. While we use gel dye for that vivid punch, this acid base reaction is what creates the tender, "velvety" protein structure in the flour.
The Oil Emulsion: Unlike butter based cakes that can turn firm in the fridge, vegetable oil remains liquid at room temperature, ensuring the cake feels moist even after being chilled with its cheese frosting.
| Method | Time | Texture | Best For |
|---|---|---|---|
| Traditional Oven | 20 minutes | Classic, airy, slight crust | Maximum height and fluffiness |
| Stovetop Steam | 25 minutes | Ultra dense, pudding like | Small batches without an oven |
| Air Fryer | 15 minutes | Crispy exterior, soft core | Quick single serving cravings |
Using an oven at 180°C remains the gold standard for this specific recipe because it allows the baking soda to react quickly with the buttermilk, pushing the batter upward before the crumb sets. This creates the airy pockets we need. If you've enjoyed the structure of our Valentines Day Heart recipe, you'll notice a similar focus on precise temperature control here to prevent the edges from drying out.
Key Specifications and Timing Guide
To get these right, you need to respect the clock and the thermometer. Red velvet is sensitive; leave it in three minutes too long, and that vivid red turns into a muddy brick brown.
We are looking for an internal temperature of exactly 98°C if you use a probe, though the "spring back" touch test is usually my go to.
| Thickness | Internal Temp | Rest Time | Visual Cue |
|---|---|---|---|
| Standard Cupcake | 98°C | 10 minutes | Springs back when pressed |
| Mini Cupcake | 98°C | 5 minutes | Edges pull from liner |
| Jumbo Cupcake | 100°C | 15 minutes | Toothpick comes out clean |
Chef's Tip: Use a room temperature egg. A cold egg will seize the fats in the batter, leading to a clumpy emulsion and a streaky, uneven color in your finished Soft and Moist Red Velvet Cupcake for Celebrations Delight with Cream Cheese Frosting.
Selecting the Right Ingredients
You cannot swap ingredients willy nilly here. The interaction between the vinegar and the baking soda is what gives these their lift since there is no baking powder involved. If you miss the mark on the acidity, the cupcakes will be flat and sad.
- 1.5 cups (190g) all purpose flour: Provides the structural foundation.
- 1 cup (200g) granulated sugar: Sweetens and tenderizes the crumb.
- 1 tsp (5g) unsweetened cocoa powder: Why this? Adds depth and reacts with acid for the signature velvet texture.
- 1 tsp baking soda: The primary leavening agent.
- 0.5 tsp salt: Enhances the cocoa and vanilla notes.
- 1 large egg: Binds the emulsion.
- 0.75 cup (180ml) vegetable oil: Ensures lasting moisture.
- 0.75 cup (180ml) full fat buttermilk: Why this? Essential acid for the baking soda reaction and tender crumb.
- 1 tsp distilled white vinegar: Boosts the leavening power.
- 1 tsp vanilla extract: Rounds out the flavor profile.
- 2 tsp red gel food coloring: Provides the vivid, iconic hue.
- 8 oz (225g) full fat brick cream cheese: The base for the tangy Cheese Frosting.
- 0.5 cup (115g) unsalted butter: Adds stability and richness to the frosting.
- 3 cups (360g) powdered sugar: Sifted to ensure a satiny finish.
- 1 tsp vanilla extract (for frosting): For aromatic sweetness.
- 1 pinch salt: Balances the sugar in the frosting.
| Original Ingredient | Substitute | Why It Works |
|---|---|---|
| Buttermilk (180ml) | Milk + 1 tbsp lemon juice | Mimics acidity. Note: Crumb may be slightly less tender. |
| Vegetable Oil | Melted Coconut Oil | Similar fat profile. Note: Adds a subtle tropical scent. |
| Red Gel Color | Beet Powder | Natural alternative. Note: Result will be earthy maroon, not bright red. |
The key to a Moist Red Velvet Cupcake for Celebrations Delight with Cream Cheese Frosting is ensuring that the buttermilk is full fat. Lower fat versions lack the viscosity needed to support the bubbles created by the baking soda, which can lead to the cupcakes collapsing as they cool.
Essential Tools for Professional Results
Having the right gear makes the difference between a messy kitchen and a streamlined bake. You don't need a professional laboratory, but a few specific items are non negotiable for that viral worthy look.
- Sifter: Essential for the 360g of powdered sugar to avoid lumps in the Cheese Frosting.
- Digital Scale: To measure the 190g of flour precisely; too much flour is the #1 cause of dry cakes.
- Stand Mixer: Such as a KitchenAid, for whipping the cream cheese and butter into a satiny cloud.
- 12 cup Muffin Tin: Standard size for even heat distribution.
- Piping Bag and Tips: A large open star tip (like a 1M) for that classic bakery swirl.
- Rubber Spatula: For folding the dry and wet ingredients without over aerating.
If you are looking to expand your baking repertoire after this, the techniques for smooth batters are quite similar to what you'll find in our Banana Pudding Cheesecake Recipe. Both require careful attention to the temperature of your dairy to prevent breaking the emulsion.
step-by-step Method for Baking Success
1. Prepping the Dry Foundation
Preheat your oven to 180°C. Sift the 190g of all purpose flour, 200g sugar, 5g cocoa powder, 1 tsp baking soda, and 0.5 tsp salt into a large bowl. Note: Sifting ensures the cocoa isn't clumpy, which prevents brown spots in your red batter.
2. Whisking the Wet Emulsion
In a separate medium bowl, whisk together the 180ml oil, 180ml buttermilk, the egg, 1 tsp vinegar, 1 tsp vanilla, and the 2 tsp red gel food coloring. Whisk until the color is uniform and vivid.
3. Combining for a Velvety Crumb
Make a well in the center of the dry ingredients and pour in the wet mixture. Use a large whisk or spatula to combine. Stop as soon as no dry streaks remain. Note: Over mixing develops gluten, which will turn your velvet cupcake into a tough bread roll.
4. Baking to Perfection
Line your tin and fill each cavity about two thirds full. Bake for 17 to 20 minutes until a toothpick comes out with only a few moist crumbs.
5. Whipping the Tangy Frosting
While the cakes cool, beat the 225g cream cheese and 115g butter for 3 minutes until pale and voluminous. Add the 360g powdered sugar in stages.
6. Finishing with Flair
Add the vanilla and a pinch of salt to the frosting. Beat on high for one final minute until the texture is satiny and smooth. Pipe generous swirls onto the completely cooled cupcakes.
| Component | Science Role | Pro Secret |
|---|---|---|
| Vinegar | Activates Soda | Use distilled white for the cleanest flavor profile. |
| Cocoa Powder | Flavor/Texture | Use non alkalized (natural) for the best acid reaction. |
| Cream Cheese | Fat/Tang | Must be the brick style, not the spreadable tub version. |
Resolving Common Baking Challenges
Why Your Cupcakes Sank
This usually happens because the oven door was opened too early, causing a sudden temperature drop before the structure set. It can also be caused by expired baking soda. If the soda is old, it won't produce enough carbon dioxide to hold the weight of the batter.
Fixing Runny Frosting
If your Cheese Frosting is sliding off the cake, the butter or cheese was likely too warm. You can't fix this by just adding more sugar, as it will become cloyingly sweet. Instead, pop the whole bowl in the fridge for 20 minutes, then re whip.
| Problem | Root Cause | Solution |
|---|---|---|
| Dry Crumb | Over baking or too much flour | Use a scale for 190g flour; pull at 18 minutes. |
| Muddy Color | Too much cocoa | Stick to exactly 5g; too much cocoa overpowers the red. |
| Grainy Frosting | Un sifted sugar | Always sift powdered sugar through a fine mesh sieve. |
Common Mistakes Checklist
- ✓ Never use "liquid" food coloring from the grocery store aisle; it waters down the batter. Use gel.
- ✓ Don't frost warm cupcakes, or you'll end up with a melted puddle of sugar.
- ✓ Ensure the cream cheese is truly at room temperature to avoid tiny white lumps in the frosting.
- ✓ Fill the liners exactly two thirds full; overfilling leads to "mushroom tops" that stick to the pan.
- ✓ Use a neutral oil like canola or vegetable; olive oil is too strong for this flavor profile.
Personalizing Your Red Velvet Creations
If you want a deeper chocolate hit, you can add 50g of mini semi sweet chocolate chips to the batter. They won't sink if you toss them in a teaspoon of flour before folding them in. This adds a nice textural contrast to the Soft and Moist Red Velvet Cupcakes.
For a festive twist, you can core the center of the cooled cupcake and fill it with a white chocolate ganache. This "lava" effect is always a hit at parties. If you’re catering to a dairy-free crowd, swap the buttermilk for soy milk mixed with vinegar and use a vegan butter/cream cheese alternative.
The results will be slightly denser but still delicious.
| Plating Level | Technique | Visual Effect |
|---|---|---|
| Simple | Offset spatula swipe | Homestyle, rustic charm |
| Polished | Large 1M star tip swirl | Classic bakery aesthetic |
| Restaurant | Fine crumbs on top + gold leaf | High end, luxury presentation |
Guidelines for Storage and Waste
Store your frosted Red Velvet Cupcakes with Cream Cheese Frosting in an airtight container in the fridge for up to 5 days. Because of the dairy in the frosting, they cannot sit out at room temperature for more than 2 hours.
For the best eating experience, let them sit at room temp for 15 minutes before serving so the butter in the frosting can soften slightly.
Zero Waste Tip: If you have leftover frosting, it makes a great dip for graham crackers or fruit. Any cupcake tops that didn't quite make the "pretty" cut can be crumbled up and used as a garnish for the ones you are serving.
You can even freeze the crumbs to use as a topping for vanilla ice cream later!
Freezing: You can freeze the unfrosted cupcakes for up to 3 months. Wrap them individually in plastic wrap, then place them in a freezer bag. Thaw at room temperature before frosting.
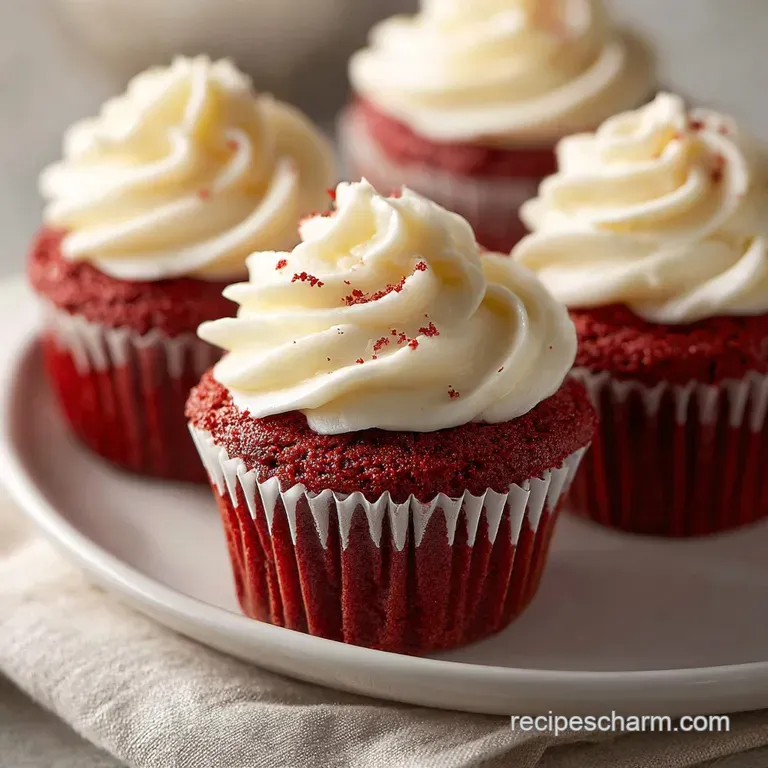
Elegant Presentation and Serving Ideas
To make these for Celebrations Delight with Cream Cheese Frosting, I love to lean into the contrast of the red cake and white frosting. A light dusting of the red cake crumbs on top of the white swirl is the classic look for a reason it’s stunning.
For a more modern vibe, try a flat top pipe with a single fresh raspberry or a sprig of mint.
If you are serving these at a dinner party, place them on a dark slate board. The red pops against the dark background, making the vivid color look even more intense. Pair them with a cold glass of milk or a sharp espresso to cut through the richness of the Cheese Frosting.
Trust me, the combination of the slightly bitter coffee and the sweet, tangy cupcake is a match made in heaven.
For more inspiration on beautiful desserts that take less than an hour, you might want to see how we handle the Valentines Day Heart recipe. Much like those cookies, these cupcakes rely on high-quality ingredients to do the heavy lifting for the flavor. Don't skimp on the vanilla!
Myths About Red Velvet
The "Chocolate Cake" Misconception: Many people think red velvet is just chocolate cake with red dye. In reality, a true red velvet has a very small amount of cocoa. If you add too much, you lose the tang of the buttermilk and the texture becomes too heavy.
It's meant to be a light, acidic cake with just a whisper of chocolate.
The Beet Juice Myth: While historical versions used beet juice for color, modern red velvet relies on the chemical reaction of acids and the addition of concentrated gels. Using only beets will result in a cake that tastes like a garden and looks brownish purple after baking.
Stick to the gel if you want that iconic "wow" factor.
Searing the Crumb: Some believe you need to bake at high heat to "seal" the moisture. Baking at 180°C is actually the limit; any higher and the sugar will caramelize too much, masking the delicate flavors and making the edges tough instead of soft and velvety.

Recipe FAQs
Must I use buttermilk, or can I substitute regular milk?
No, you must use an acidic alternative like buttermilk. Buttermilk is crucial because its acid reacts with the baking soda to create the light, tender "velvet" crumb structure.
How to achieve the most vibrant red color?
Use high-quality red gel food coloring, not liquid drops. Gel color is highly concentrated, meaning you use less product, which avoids thinning the delicate batter.
Is it true I need to use oil instead of butter for moisture?
Yes, oil is the superior choice here. Oil remains liquid at cooler refrigerator temperatures, ensuring the cupcakes stay moist even when chilled alongside the cream cheese frosting.
How to prevent the cream cheese frosting from becoming too soft or runny?
Chill the whipped butter and cream cheese mixture for 20 minutes before adding powdered sugar. This adds necessary stability to the fat base, preventing weeping or sliding later on.
Why do my cupcakes taste slightly sour even though I added enough sugar?
This is likely due to over developing the gluten or improper leavening. Stop mixing as soon as the streaks disappear, ensuring the acid/base reaction sets the soft structure properly.
How long can I store the finished cupcakes with frosting?
Up to 5 days in the refrigerator in an airtight container. Remember to pull them out about 15 minutes before serving so the frosting softens slightly for the best texture.
How to get perfectly flat tops ideal for piping swirls?
Fill your liners exactly two-thirds full and bake at a steady 180°C. Overfilling or fluctuating the temperature causes the centers to dome excessively.
Moist Red Velvet Cupcakes

Ingredients:
Instructions:
Nutrition Facts:
| Calories | 505 calories |
|---|---|
| Protein | 3.9 g |
| Fat | 28.3 g |
| Carbs | 60.4 g |
| Fiber | 0.5 g |
| Sugar | 47.2 g |
| Sodium | 268 mg |
