Love at First Bite Valentines Day Cake Pop with Red Velvet
- Time: Active 45 minutes, Passive 30 minutes, Total 1 hours 15 mins
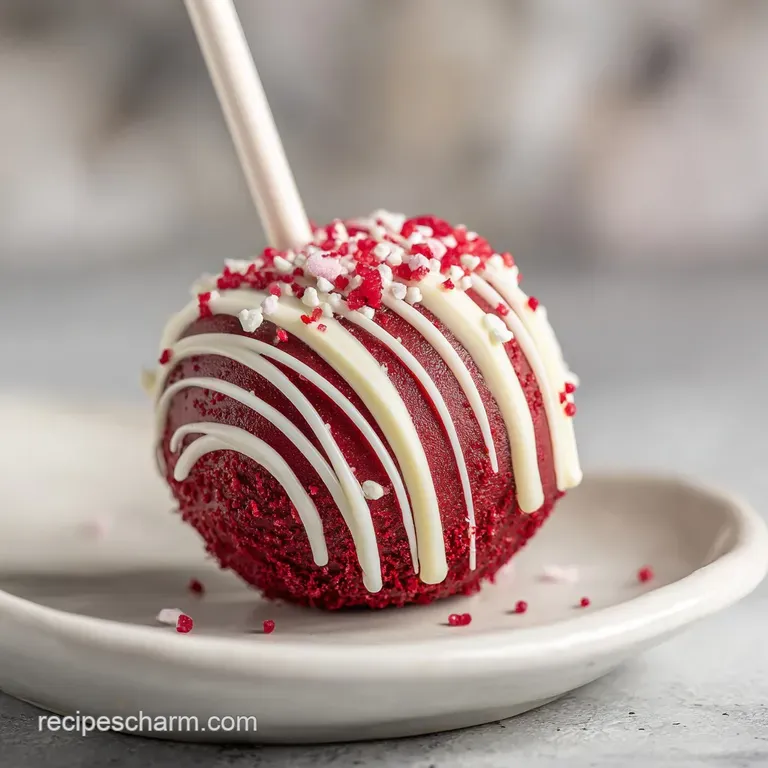
- Flavor/Texture Hook: Fudgy, velvety crumb encased in a shatter thin chocolate shell
- Perfect for: Romantic gifting, Galentine's parties, or a viral worthy dessert spread
- Love at First Bite Valentines Day Cake Pop with Red Velvet
- Decoding the Velvety Crumb Science
- Essential Recipe Specifications
- Sourcing Your Sweet Ingredients
- Necessary Tools for Success
- Step-by-Step Assembly Guide
- Avoiding Common Decorating Blunders
- Creative Flavor Variations
- Proper Storage and Preservation
- Ideal Serving Pairings
- Recipe FAQs
- 📝 Recipe Card
Love at First Bite Valentines Day Cake Pop with Red Velvet
The scent of deep cocoa and tangy buttermilk filling the kitchen is a specific kind of magic. It’s that moment when you pull a mahogany red cake from the oven, its surface slightly crackled, knowing it's about to become something even more stunning.
Indulge in a "Love at First Bite Valentines Day Cake Pop with Red Velvet" for a single, unforgettable treat this Valentine's Day.
We've all seen those sad, crumbly cake pops that fall off the stick, but these are different. We're talking about a center so dense and fudgy it feels like a truffle, wrapped in a shell that yields with a satisfying "snap." It's about finding that balance where the cream cheese frosting doesn't overwhelm the cake, but binds it into a velvety orb of pure luxury.
Forget those dry, store-bought versions that taste like cardboard and sugar. We're using a scratch made base that leans into the traditional vinegar soda reaction, giving us that signature tight crumb.
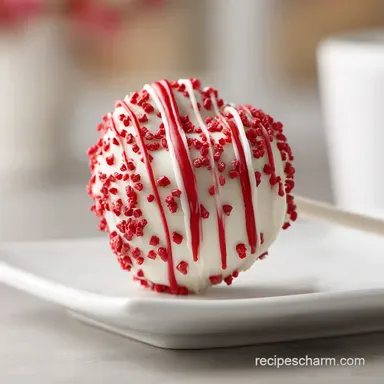
Whether you’re making these for a partner or just to flex your baking skills on the feed, the result is a romantic valentine cake pops experience that looks as high end as it tastes.
Decoding the Velvety Crumb Science
Acidic Leavening: The distilled vinegar reacts instantly with the baking soda to create tiny carbon dioxide bubbles, resulting in a fine textured cake that won't fall apart when rolled.
The Fat Barrier: Using 0.75 cup vegetable oil instead of butter ensures the cake stays moist even after being crumbled and chilled, preventing a dry or sandy mouthfeel.
Emulsification Stability: The room temperature buttermilk and egg bind the cocoa and flour together, creating a structure that holds its shape under the weight of heavy red candy melts.
| Method | Prep Time | Resulting Texture | Best For |
|---|---|---|---|
| Stovetop (Steamed) | 40 mins | Ultra moist, dense | High humidity environments |
| Oven Baked (180°C) | 30 mins | Traditional crumb, sturdy | Perfect cake pop spheres |
| Microwave | 8 mins | Spongy, less stable | Last minute emergencies |
Choosing the oven method is non negotiable for that classic red velvet profile. The dry heat helps set the proteins in the 1.5 cups of all purpose flour, giving the cake enough "backbone" to stand upright on a stick without sliding down. If you've ever mastered a Red Velvet Cupcakes recipe, you know that the internal structure is everything when you're aiming for a velvety finish.
Essential Recipe Specifications
| Component | Science Role | Pro Secret |
|---|---|---|
| Buttermilk | Protein Tenderizer | Always use room temperature to prevent the oil from seizing. |
| Red Food Gel | Pigment Density | Gel provides a deeper mahogany than liquid without thinning the batter. |
| Dutch Cocoa | Flavor Depth | Provides the mild chocolate notes without adding excessive acidity. |
Sourcing Your Sweet Ingredients
- 1.5 cups (190g) All Purpose Flour: The structural foundation. Why this? Provides enough gluten to hold the ball shape without being tough.
- 0.75 cup (150g) Granulated Sugar: Sweetness and moisture. Why this? Dissolves cleanly to maintain a smooth, non gritty cake texture.
- 1 tbsp (5g) Dutch Processed Cocoa: For that classic flavor. Why this? It's less acidic and darker than natural cocoa, enhancing the red.
- 0.5 tsp (2.5g) Baking Soda: The leavening agent.
- 0.5 tsp (3g) Salt: Flavor balancer.
- 0.75 cup (165g) Vegetable Oil: Liquid fat. Why this? Keeps the cake moist even when stored in the fridge.
- 0.75 cup (185g) Buttermilk: Tang and moisture. Why this? Activates the soda and tenderizes the flour’s gluten.
- 1 Large Egg: The binder.
- 1 tsp (5ml) White Vinegar: The color catalyst. Why this? Preserves the red pigment and ensures a light, airy crumb.
- 1 tsp (5ml) Vanilla Extract: Aromatics.
- 1 tbsp (15g) Red Food Gel: Concentrated color.
- 4 oz (115g) Cream Cheese: The creamy binder.
- 2 tbsp (28g) Unsalted Butter: Richness for the frosting.
- 1 cup (120g) Powdered Sugar: Sweet binder stability.
- 16 oz (450g) Red Candy Melts: The outer shell.
- 2 tsp (10g) Coconut Oil: Thinning agent. Why this? Helps the candy melts flow smoothly for a professional finish.
Chef's Tip: Freeze your cake for 10 minutes before crumbling. It makes the process much cleaner and prevents the cake from turning into a gummy paste when mixed with the cream cheese.
Necessary Tools for Success

You don't need a professional laboratory, but a few specific tools will change your life. A standard 9x13 baking pan is used for the base cake, but the real star is a small cookie scoop (about 1 tablespoon size).
This ensures every single "Love at First Bite Valentines Day Cake Pop with Red Velvet" is identical in weight, which is the key to that high end, viral worthy aesthetic.
A Styrofoam block or a dedicated cake pop stand is essential for drying. If you try to lay them flat while the candy melts are wet, you'll get a flat side that ruins the silhouette.
Also, grab a deep, narrow microwave safe silicone cup for melting the red candy melts; the depth allows for a full, single motion dip that prevents those dreaded air bubbles.
step-by-step Assembly Guide
1. Baking the Mahogany Base
Preheat your oven to 350°F (180°C). Whisk the 1.5 cups flour, sugar, cocoa, soda, and salt. In a separate bowl, blend the oil, buttermilk, egg, vinegar, vanilla, and red gel.
Combine until just smooth, pour into a greased pan, and bake for 30 minutes until a tester comes out clean.
2. Crafting the Velvety Crumb
Once fully cooled, tear the cake into chunks. Use your hands or a food processor to pulse the cake into fine, sandy crumbs. Avoid any large chunks, as these will cause bumps in your final romantic valentine cake pops.
3. Creating the Binding Frosting
Cream the 4 oz cream cheese and 2 tbsp butter until silky. Gradually add the 1 cup powdered sugar. Mix this into your cake crumbs one tablespoon at a time. You want a texture like damp sand that holds together when squeezed without being greasy.
4. Sculpting the Silhouettes
Roll the mixture into 25 even spheres. If you want valentines day cake pops heart shaped, pinch the bottom of the sphere and use a toothpick to indent the top center. Place these on a tray and chill for at least 2 hours until firm to the touch.
5. Priming the Sticks
Melt a small handful of red candy melts. Dip the tip of each lollipop stick into the melted candy, then insert it halfway into a chilled cake ball. This acts as a "glue" to prevent the pop from sliding off later.
6. Mastering the Dip
Melt the remaining 16 oz candy melts with 2 tsp coconut oil in 30 second bursts. Stir until velvety. Submerge a cake pop vertically until the coating hits the stick, then lift straight up.
7. The Gentle Tap
Hold the pop over the bowl and gently tap your wrist not the stick to let excess coating drip off. Rotate the pop slowly to ensure an even, smooth surface as it sets.
8. Final Decorative Touches
Before the coating dries, add sprinkles or sugar pearls. For a professional look, drizzle a little extra melted chocolate in a zig zag pattern across the front. Let them set in a stand for 20 minutes until the shell is shatter crisp.
Avoiding Common Decorating Blunders
Why Your Cake Pops Fall Off
If your pops are diving off the stick, the core is likely too warm or the frosting ratio is too high. A heavy hand with the cream cheese turns the cake into a "slump" rather than a sturdy ball. Always ensure that initial 2 hour chill is strictly followed.
Eliminating Air Bubbles
Air bubbles usually happen when you stir the melted candy too vigorously or if the cake balls are too cold. When cold cake hits warm candy, the air inside expands and pushes out. Let your chilled balls sit at room temperature for 5 minutes before dipping to bridge that thermal gap.
| Problem | Root Cause | Solution |
|---|---|---|
| Cracking Shell | Thermal shock (cake too cold) | Let cake balls sit out 5-10 mins before dipping. |
| Oil Leaking | Too much frosting/oil | Reduce cream cheese binder in next batch. |
| Streaky Color | Overheated candy melts | Melt in short intervals; stir in coconut oil. |
Common Mistakes Checklist:
- ✓ Pat the cake crumbs dry if they feel oily before adding frosting.
- ✓ Never skip the "glue" step with the melted candy on the stick.
- ✓ Use a deep vessel for dipping to avoid "swirling," which creates bubbles.
- ✓ Ensure the candy coating is fluid; if it's thick like lava, add more coconut oil.
- ✓ Keep the cake pops upright in a stand while drying to avoid flat spots.
Creative Flavor Variations
If you want a deeper chocolate profile, try making chocolate cake pops valentine's day style by adding an extra tablespoon of cocoa and a splash of espresso to the batter. The coffee won't make it taste like java; it just makes the chocolate notes sing.
You could also swap the red candy melts for white chocolate and use a pink gel for a soft "blush" look.
For a surprise center, press a small piece of dark chocolate or a tiny dollop of Nutella into the middle of the cake ball before rolling. This creates a truffle like core that is a total game changer. If you are looking for a shorter project, you might even consider a Valentines Day Heart recipe as a side car to these pops.
| Servings | Cake Quantity | Frosting Needed | Candy Melts |
|---|---|---|---|
| 12 Pops | 1/2 Cake Recipe | 2 oz Cream Cheese | 8 oz Melts |
| 25 Pops | Full Recipe | 4 oz Cream Cheese | 16 oz Melts |
| 50 Pops | 2x Recipe | 8 oz Cream Cheese | 32 oz Melts |
Proper Storage and Preservation
Keep these in the fridge in an airtight container for up to 5 days. The candy shell actually acts as a seal, keeping the cake inside moist and velvety. If you see "sweat" (condensation) on the outside, it's usually because they were moved from a very cold fridge to a warm room too quickly.
For long term storage, you can freeze the undipped cake balls for up to 2 months. Just thaw them in the fridge overnight before you plan to dip them. I don't recommend freezing fully decorated pops, as the expansion can crack the shell, and the sprinkles might bleed.
To reduce waste, any leftover cake crumbs can be toasted and used as a topping for yogurt or ice cream. If you have leftover melted candy, spread it on parchment paper, top with nuts or dried fruit, and let it set for a quick chocolate bark.
Ideal Serving Pairings
These pops are quite rich, so they pair beautifully with a crisp, dry sparkling wine or a tart hibiscus tea. If you're setting up a full dessert bar, they look stunning next to a Love Bug Oreo recipe which adds a different texture and whimsical vibe to the table.
- Myth
- You must use canned frosting for the best texture. Truth: Homemade cream cheese frosting provides a much better "tang" that cuts through the sweetness of the candy shell.
- Myth
- Cake pops are just "leftover" cake. Truth: The best homemade cake pops with red candy melts are made from a specifically baked, tight crumb cake designed to hold moisture.
- Myth
- You need a special machine to bake the balls. Truth: Hand rolling baked cake with a binder creates a much fudgier, superior texture compared to the "cake hole" machines.

Recipe FAQs
What flavor is the red heart cake pop at Starbucks?
Typically Red Velvet. Starbucks often features a Valentine's Day flavor that mirrors the classic red velvet profile, meaning a subtle cocoa cake with a hint of tang.
What flavor is the Valentine's Day cake pop at Starbucks?
Often Red Velvet or Chocolate. For the "Love at First Bite Valentines Day Cake Pop with Red Velvet," expect the deep cocoa flavor of traditional red velvet encased in a signature pink or red shell.
How much is the Dairy Queen red velvet cupid cake?
Pricing varies significantly by location and size. You should check your local Dairy Queen's seasonal menu online or call ahead for the current price of their specialty Valentine's desserts.
What is the new cake pop at Starbucks 2025?
Specific 2025 flavors are unconfirmed at this time. Starbucks typically releases seasonal menus around January/February, often featuring returning favorites like Red Velvet alongside one new experimental flavor.
Is it true you must chill the cake crumb mixture before rolling?
Yes, chilling is non-negotiable for proper structure. Rolling warm or room temperature crumbs results in a sticky, greasy mess that won't hold the sphere shape when dipped.
How to ensure the candy coating stays smooth and doesn't seize?
Add a small amount of refined oil or shortening. Even when melting candy melts, adding about one teaspoon of coconut oil or vegetable oil per 12 ounces prevents the fats from separating or seizing up.
What is the key technique to prevent the pop from sliding off the stick?
Apply a melted candy anchor before final dipping. Dip the tip of the stick into melted candy melts, insert it into the chilled cake ball, and let that "glue" harden in the fridge first.
Valentines Day Red Velvet Cake Pops
Ingredients:
Instructions:
Nutrition Facts:
| Calories | 257 calories |
|---|---|
| Protein | 1.6 g |
| Fat | 15.1 g |
| Carbs | 28.3 g |
| Fiber | 0.4 g |
| Sugar | 21.6 g |
| Sodium | 128 mg |
