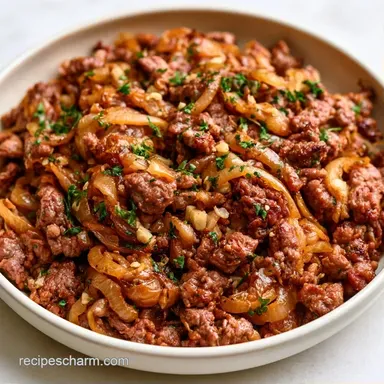
High Protein Ground Beef Bowl in 30 Minutes
- Time: 10 min active + 20 min cooking
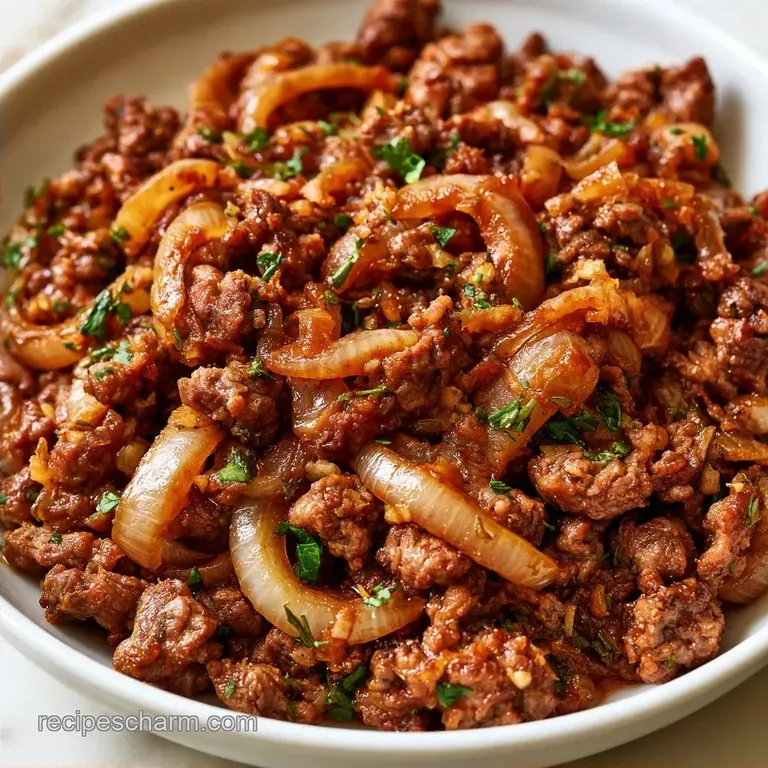
- Flavor/Texture Hook: Mahogany seared beef with a glossy glaze
- Perfect for: Weeknight dinner or gym day meal prep
That sound of beef hitting a screaming hot skillet is basically my favorite song. There's a specific moment when the sizzle shifts from a splash to a steady, aggressive crackle, and that's when you know you're doing it right.
I used to just toss meat in a pan and stir it until it turned grey, which is basically a crime against flavor. Now, I treat lean ground beef as the hero of the meal. It's the most efficient way to get a massive protein hit without spending an hour prepping a roast or breaking the bank on steak.
The trick is all in the fat ratio. I use lean ground beef because it holds onto the glaze better and doesn't leave a layer of oil floating on top of your rice. When you get that deep, brown crust on the meat, it creates a savory base that stands up to the honey and sriracha.
This High Protein Ground Beef Bowl isn't about fancy techniques, it's about respecting the heat.
You can expect a meal that feels like takeout but actually fuels your body. We're talking tender beef, crisp carrots, and steamed broccoli all tied together with a sauce that clings to every crumble. It's vibrant, energizing, and takes less than half an hour from start to finish.
Easy High Protein Ground Beef Bowl
| Goal | What to change |
|---|---|
| Lower Calories | Swap brown rice for cauliflower rice |
| Extra Spice | Double the sriracha or add red pepper flakes |
| More Volume | Add an extra cup of steamed spinach |
Choosing between the stove and the oven usually depends on how much you like to baby your food. For this specific dish, the stovetop is the clear winner for that crust.
| Method | Time | Texture | Best For |
|---|---|---|---|
| Stovetop | 20 mins | Crispy, caramelized edges | Maximum flavor punch |
| Oven | 30 mins | Uniformly cooked, softer | Hands off batch cooking |
The Shopping List
Lean ground beef is the anchor here. I prefer 93% lean because it provides a clean protein source that doesn't overwhelm the sauce with grease. If you go too lean (like 99%), the meat can get dry, so stick to the middle ground.
For the base, brown rice provides a nutty flavor and steady energy, but you can switch it based on your goals. The vegetables are there for crunch and micronutrients. Carrots and broccoli are staples, but you can throw in whatever is wilting in your crisper drawer.
| Original Ingredient | Substitute | Why It Works |
|---|---|---|
| Brown Rice (3 cups) | Quinoa (3 cups) | More protein and similar texture. Note: Slightly nuttier taste |
| Avocado Oil (1 tbsp) | Grapeseed Oil (1 tbsp) | High smoke point keeps the pan hot. Note: Neutral flavor |
| Honey (1 tbsp) | Maple Syrup (1 tbsp) | Similar sweetness and viscosity. Note: Adds a woody note |
| Low Sodium Soy Sauce (1/4 cup) | Coconut Aminos (1/4 cup) | Lower sodium, soy free. Note: Slightly sweeter than soy |
| Sriracha (1 tsp) | Sambal Oelek (1 tsp) | Similar heat profile. Note: More chunky/raw chili flavor |
Needed Kitchen Tools
A 12-inch skillet is essential for this recipe. Using a smaller pan crowds the meat, which leads to steaming rather than searing; when the beef is too packed, it releases excess water and you'll miss out on that mahogany crust.
I recommend a sturdy silicone spatula for breaking up the beef. It works better than a spoon because it lets you scrape the fond, those flavorful browned bits, off the bottom and stir them back in.
To keep things smooth while the pan is hot, have a couple of small bowls ready for your glaze and cornstarch slurry.
Making the Bowl
Phase 1: The Prep
Chop your onion and garlic first. In a small bowl, whisk together the soy sauce, honey, ginger, and sriracha. In another tiny container, mix the cornstarch and water until smooth. Having this ready is the only way to ensure your garlic doesn't burn while you're hunting for the honey.
Phase 2: Searing for Flavor
Heat avocado oil in your 12 inch skillet over medium high heat until it shimmers. Add the ground beef in a flat layer. Let it sit undisturbed for 3-4 minutes until a dark mahogany crust forms on the bottom. This is the most important part.
Once seared, break the meat into small crumbles and cook until no longer pink. Stir in the diced onions and garlic, sautéing for 3 minutes until the onions look translucent and smell fragrant.
Phase 3: The Glaze & Finishing
Pour the soy ginger mixture over the beef. Stir constantly for 1-2 minutes as the sauce bubbles and thickens. Stir in the cornstarch slurry and cook for another minute until the sauce becomes a velvety, glossy coating that sticks to the beef.
Remove from heat immediately so it doesn't turn into a paste.
Phase 4: Assembly
Divide your cooked brown rice into four bowls. Scoop a generous portion of the glazed beef over the rice. Add the steamed broccoli and shredded carrots to the side. Garnish with sliced green onions and a sprinkle of sesame seeds for that final pop of color.
Solving Common Issues
Fixing Grey Meat
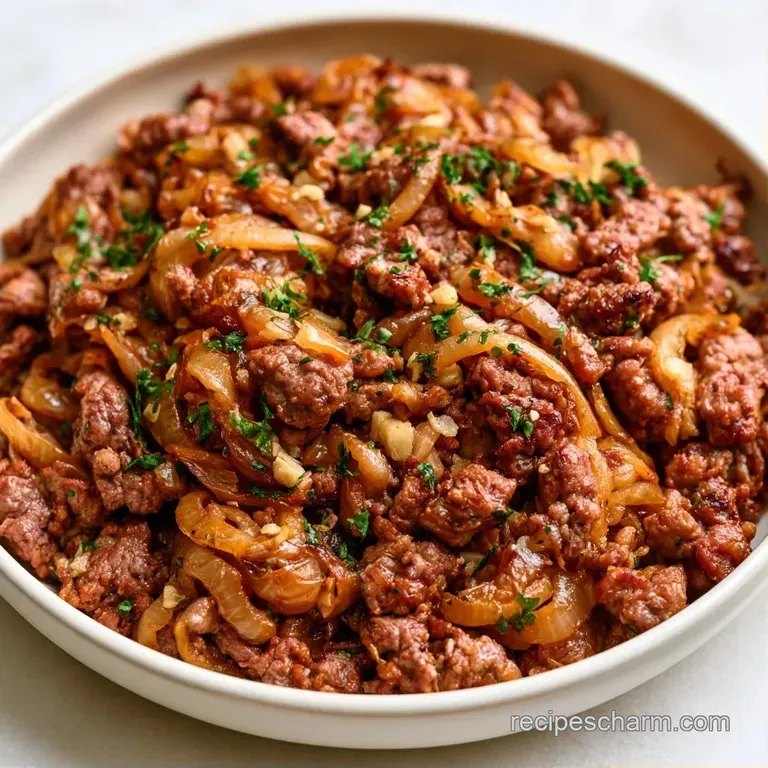
If your beef looks grey and is swimming in liquid, your pan wasn't hot enough or you stirred too soon. To fix this, crank the heat to medium high and stop stirring. You need to evaporate that moisture and let the meat actually touch the hot metal to brown.
Handling Thin Sauce
If the glaze is too watery and pooling at the bottom of the bowl, you might have skipped the slurry or not cooked it long enough. You can fix this by adding a tiny bit more cornstarch mixed with water and simmering for another 60 seconds.
Avoiding Burnt Garlic
Garlic burns in a heartbeat if it hits a dry, scorching pan. Always add your onions first or stir the garlic in just as you're about to add the liquid glaze. The moisture from the onions protects the garlic from scorching.
Fun Flavor Swaps
This base is incredibly versatile, allowing for flavors beyond Asian-style profiles. To make a High Protein Ground Beef Taco Bowl, replace the soy and ginger with cumin, chili powder, and a squeeze of lime. Swap the broccoli for black beans and finish with fresh avocado.
For a High Protein Ground Beef Bowl Low Carb version, just omit the rice. I often use extra steamed broccoli or a base of sautéed cauliflower rice. Since the beef is so satisfying, it still feels like a hearty meal. For more fast beef ideas, my Korean ground beef is another high-protein choice using similar pantry staples.
Adding More Heat
If sriracha isn't quite enough, add crushed red pepper flakes while sautéing the garlic. For an extra punch, top your bowl with chili crunch oil or sliced fresh jalapeños.
Boosting Protein
To increase the protein content further, stir some edamame in with the broccoli. You can also mix a tablespoon of nutritional yeast into the rice for added protein and a subtle cheesy taste.
Storing Your Bowls
In the Fridge
For the best quality, store the beef and rice in separate containers, though combining them in airtight tubs works great for meal prep. They remain fresh for 3-4 days. The beef retains its flavor well, but the broccoli may lose some of its crispness.
In the Freezer
The glazed beef freezes quite well for up to 2 months. I suggest not freezing the fresh carrots or broccoli. Instead, freeze the beef and rice, then stir in fresh vegetables when you reheat the dish.
Reheating Tips
To prevent the rice from becoming rubbery, try to skip the microwave. I prefer a quick sauté in a skillet with a splash of water to loosen the sauce. If you do use a microwave, cover the bowl with a damp paper towel to lock in the moisture.
Zero Waste Tips
Don't throw away your broccoli stems. Peel off the tough outer skin, dice the tender core, and sauté them along with the onions. They add a satisfying crunch and a bit of extra nutrition.
Great Side Pairings
While this bowl is a complete meal, sometimes you want something extra on the table. A side of kimchi provides a fermented, tangy contrast to the sweet honey glaze. It cuts through the richness of the beef and adds a probiotic boost.
If you're serving this to a group with different dietary needs, you can offer a side of my Buddha bowl style greens. A simple mix of massaged kale, toasted almonds, and a lemon vinaigrette balances the savory intensity of the beef.
The Fresh Crunch
A side of sliced cucumbers marinated in rice vinegar and a pinch of sugar is a classic pairing. The coolness of the cucumber resets your palate between bites of the spicy, savory beef.
Why This Works
Many recipes advise stirring the meat constantly while browning, but that is a mistake. This process steams the beef in its own liquids, resulting in a grey color and a bland taste. By letting the beef sit undisturbed, you trigger the reaction that creates those rich, mahogany notes.
The cornstarch slurry is another essential key. Without it, the soy and honey simply slide off the meat. The slurry binds the flavors, creating a thick glaze that ensures every bite of beef is packed with taste.
This balance of high heat and thickening agents is what makes this High Protein Ground Beef Bowl taste like a restaurant dish.
High in Sodium
880 mg 880 mg of sodium per serving (38% 38% of daily value)
The American Heart Association recommends a daily limit of 2,300mg of sodium to help manage blood pressure and reduce the risk of heart disease.
Tips to Reduce Sodium
-
Swap for Coconut Aminos-30%
Replace the low-sodium soy sauce with coconut aminos, which provide a similar savory flavor with significantly less sodium.
-
Omit Added Salt-25%
Completely remove the 1/2 tsp of salt from the recipe, as the sauces already provide enough salinity for the dish.
-
Fresh Chili Substitute-10%
Swap the sriracha for freshly diced red chilies or a pinch of red pepper flakes to maintain heat without the added sodium.
-
Boost Aromatics
Double the amount of fresh ginger and garlic to enhance the flavor profile and make the reduction of salt less noticeable.
Recipe FAQs
Is ground beef good for a high protein diet?
Yes, it is. Lean ground beef provides a dense source of complete protein and essential minerals like iron.
Can I reach 40g of protein at lunch with this?
Yes, eat one full serving. The combination of lean beef and brown rice easily hits this target.
What can I add to ground beef for more protein?
Incorporate extra steamed broccoli. Adding more of the included vegetables increases the total protein and fiber in every bowl.
Is it true that lean ground beef cannot brown effectively?
False. Using avocado oil over medium-high heat allows lean beef to develop a deep, mahogany sear.
How to achieve a mahogany crust on the beef?
Press the meat in a flat layer and leave it undisturbed for 3-4 minutes. This prevents steaming and promotes proper caramelization.
What makes this a viral protein bowl?
The contrast of a sweet-savory glaze with clean staples. It mimics the flavor of takeout while remaining nutrient-dense.
Could I use a different base than brown rice?
Yes, any cooked grain works. If you enjoy the filling nature of stuffed peppers, you can use a similar rice mix here.
Does stirring the meat immediately help it cook faster?
This one's false: Constant stirring releases moisture, which steams the meat and prevents a crust from forming.
High Protein Ground Beef Bowl Meal Prep