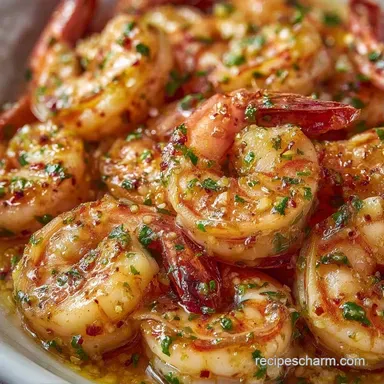
10 Minute Sautéed Shrimp with Garlic: Tender and Savory
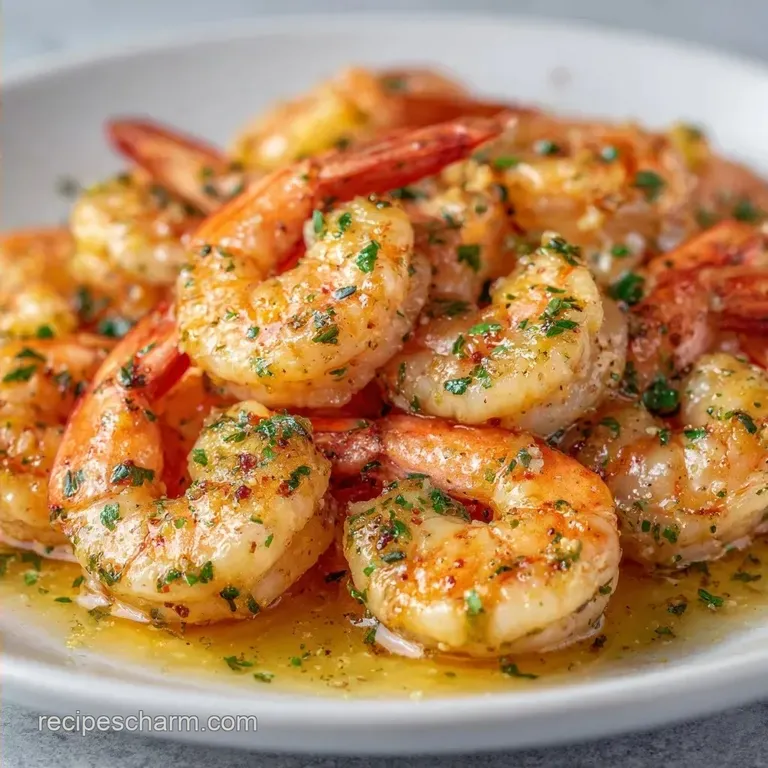
- Time: 5 min active + 5 min cook
- Flavor/Texture Hook: Velvety butter sauce with a snappy, seared bite
- Perfect for: Fast family dinners or a low stress date night
- 10 Minute Sautéed Shrimp with Garlic
- The Secret to Tender Texture
- Quick Recipe Specs
- Essential Ingredients List
- Required Kitchen Tools
- Component Analysis
- Step by Step Cooking
- Solving Common Cooking Issues
- Smart Swaps and Variations
- Adjusting Portion Sizes
- Debunking Shrimp Myths
- Storage and Reheating Tips
- Serving and Plating Guide
- Recipe FAQs
- 📝 Recipe Card
10 Minute Sautéed Shrimp with Garlic
That aggressive sizzle when cold shrimp hit a hot pan is my favorite sound in the kitchen. There is something about the smell of garlic hitting foaming butter that just makes a house feel like a home.
I used to be terrified of shrimp because I always ended up with those rubbery, overcooked little balls that bounce off the plate. I spent a few years just guessing the timing, usually failing miserably, until I realized the secret isn't the heat, but the timing and the removal of the protein from the pan.
If you have a busy Tuesday and a frozen bag of shrimp, you can still have a meal that tastes like a bistro. Learn how to make this delicious 10 Minute Sautéed Shrimp with Garlic and Butter. It is a simple process, but it relies on a few specific habits, like patting the shrimp bone dry.
If they are wet, they steam instead of sear, and you lose that golden crust.
This recipe focuses on high impact flavor with minimal cleanup. We are using a single pan and a few pantry staples to get a result that is rich, zesty, and incredibly satisfying. You can serve it over rice, pasta, or even just with a crusty piece of bread to soak up the sauce.
The Secret to Tender Texture
Getting the texture right with shrimp is a game of seconds. Most people leave the shrimp in the pan while they make the sauce, which is a huge mistake. By the time the garlic is fragrant, the shrimp have already turned into erasers.
High Heat Sear: Searing quickly at a high temperature creates a golden exterior without cooking the center too far. This keeps the inside juicy and snappy.
The Removal Method: Taking the shrimp out of the pan before adding the butter prevents overcooking. The shrimp only go back in at the very end to get coated in the sauce.
Moisture Control: Excess water on the surface of the shrimp drops the pan temperature instantly. Drying them ensures the oil can actually fry the surface of the meat.
Acid Balance: The lemon juice doesn't just add flavor, it cuts through the heavy fat of the butter, brightening the whole dish.
| Ingredient Choice | Texture Result | Flavor Impact | Best For |
|---|---|---|---|
| Fresh Shrimp | Snappiest bite | Sweet, oceanic | Special dinners |
| Frozen (Thawed) | Slightly softer | Neutral, clean | Weeknight meals |
| Pre cooked | Rubber like | Saltier | Cold salads only |
Quick Recipe Specs
The timing here is non negotiable because shrimp cook so fast. You have to have everything chopped and ready before you even turn on the stove. If you start mincing garlic while the shrimp are searing, you will overcook them.
For those watching their macros, shrimp is a powerhouse of lean protein. According to USDA FoodData, shrimp is naturally low in fat and high in protein, making this a great base for a healthy meal.
Essential Ingredients List
I prefer using large shrimp because they hold up better to the high heat and don't shrink into nothing. If you are on a budget, frozen shrimp are a great shortcut, just make sure they are fully thawed and patted dry.
- 1.5 lbs large shrimp, peeled and deveined Why this? Large size prevents overcooking during the sear
- ½ tsp salt Why this? Basic flavor enhancer
- ¼ tsp black pepper Why this? Adds a subtle earthy heat
- 1 tbsp vegetable oil Why this? High smoke point for the initial sear
- 4 tbsp unsalted butter Why this? Creates the velvety sauce base
- 4 cloves garlic, minced Why this? Fresh garlic provides the punchy aroma
- 1 tbsp fresh lemon juice Why this? Cuts the richness of the butter
- 1 tsp red pepper flakes Why this? Adds a hint of warmth
- 2 tbsp fresh parsley, chopped Why this? Freshness and color contrast
| Original Ingredient | Substitute | Why It Works |
|---|---|---|
| Unsalted Butter | Ghee | Higher smoke point, same richness. Note: Less creamy |
| Vegetable Oil | Avocado Oil | Very high smoke point. Note: Neutral flavor |
| Fresh Lemon Juice | Rice Vinegar | Provides acidity. Note: Lacks citrus notes |
| Fresh Parsley | Fresh Cilantro | Adds a bright, herbal note. Note: Stronger flavor |
Required Kitchen Tools
You want a pan that can handle high heat. A stainless steel skillet is the gold standard here because it develops a "fond" (those brown bits on the bottom) that makes the sauce taste better. A cast iron skillet also works great if you want a deeper sear.
Avoid non stick pans if you can. They don't get as hot, and you won't get that beautiful golden color on the shrimp. If you are pairing this with a side, my Green Bean Casserole recipe is a hearty option that balances the lightness of the shrimp.
Component Analysis
Understanding how these ingredients interact helps you tweak the recipe without ruining the dish. It is all about the balance of fat and acid.
| Ingredient | Science Role | Pro Secret |
|---|---|---|
| Butter | Emulsion Base | Use cold butter for a thicker, glossier sauce |
| Garlic | Aromatic | Mince finely so it cooks evenly in 30 seconds |
| Lemon Juice | Deglazing Agent | Add at the end to keep the citrus flavor bright |
| Vegetable Oil | Heat Conductor | Only use enough to coat the pan, not deep fry |
Step by step Cooking
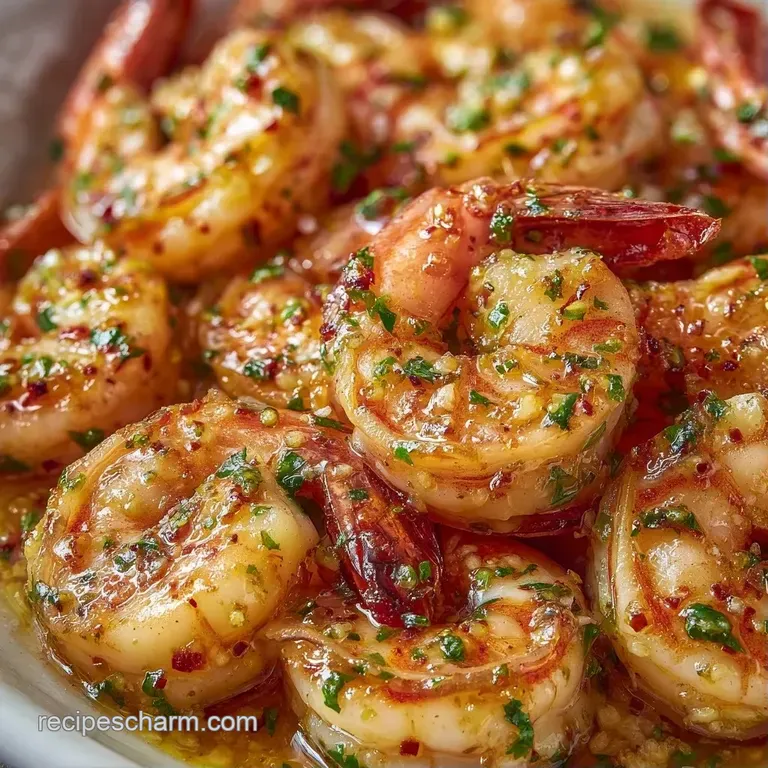
Follow these steps exactly. The timing is tight, and the transitions happen fast.
- Pat the shrimp thoroughly dry with paper towels. In a medium bowl, toss the shrimp with salt and pepper. Note: Wet shrimp will steam instead of sear
- Heat a 12 inch stainless steel or cast iron skillet over medium high heat. Add one tablespoon of oil.
- Place shrimp in a single layer in the skillet. Sear for 2 minutes without moving them, flip, and sear for 1 minute more until they are pink and golden. Remove shrimp to a plate immediately.
- Reduce heat to medium. Add the butter to the same pan. Once foaming, add the minced garlic and red pepper flakes and sauté for 30 seconds until fragrant.
- Stir in the lemon juice to deglaze the pan, then toss the shrimp back in for 30 seconds to coat in the sauce. Note: This prevents the shrimp from overcooking
- Stir in chopped parsley and remove from heat immediately.
Chef's Note: If you see the butter turning brown too quickly, pull the pan off the heat for 10 seconds. Garlic burns in a heartbeat, and burnt garlic tastes bitter.
Solving Common Cooking Issues
The most common struggle with this recipe is temperature control. Because shrimp are so small, the window between "perfectly cooked" and "rubber" is about 30 seconds.
Rubbery Shrimp Texture
This happens when shrimp are cooked for too long or cooked in a crowded pan. If the pan is too full, the temperature drops, and the shrimp release water, essentially boiling in their own juices. For the best sear, according to Serious Eats, ensure you have plenty of space between each piece.
Burnt Garlic Pieces
Garlic has a very low burn point. If you add it to the oil while the pan is still at "sear temperature," it will blacken instantly. Always drop the heat to medium before adding the butter and garlic.
Greasy Sauce Consistency
If your sauce looks like a pool of oil, it is likely because the butter separated. This usually happens if the pan is too hot when the lemon juice is added. The lemon juice should create a slight emulsion, making the sauce velvety.
| Problem | Root Cause | Solution |
|---|---|---|
| Rubber texture | Overcooked | Remove shrimp 30 seconds earlier |
| Bitter taste | Burnt garlic | Lower heat before adding aromatics |
| Watery sauce | Wet shrimp | Pat shrimp dry with paper towels |
Common Mistakes Checklist
- ✓ Avoid crowding the pan (cook in batches if needed)
- ✓ Never add garlic during the over high heat sear
- ✓ Do not skip the drying step with paper towels
- ✓ Ensure shrimp are fully thawed before cooking
- ✓ Remove shrimp from pan before making the sauce
Smart Swaps and Variations
While the classic version is great, you can easily pivot this to fit your diet or what you have in the fridge. If you want something more substantial, this works beautifully as a garlic butter shrimp pasta style dish, though the Cordon Bleu is a different protein, the rich butter logic is similar.
The Pasta Twist
Toss the finished shrimp and sauce with 8 oz of cooked linguine. Add a splash of pasta water to the pan to help the sauce cling to the noodles.
The Zesty Kick
Add a teaspoon of smoked paprika or a pinch of cayenne pepper along with the red pepper flakes for a deeper, more complex heat.
Dairy-free Swap
Replace the butter with a high-quality vegan butter or 2 tablespoons of olive oil. You will lose some of the creaminess, but the garlic and lemon will still carry the dish.
The Low Carb Option
Serve the shrimp over a bed of sautéed spinach or cauliflower rice. The butter sauce acts as a rich dressing for the greens.
| Variation | Key Change | Result |
|---|---|---|
| Creamy | Add 1/4 cup heavy cream | Richer, restaurant style sauce |
| Spicy | Double red pepper flakes | Bold, pungent heat |
| Herbaceous | Add fresh dill and thyme | Earthy, French inspired flavor |
Adjusting Portion Sizes
When you change the amount of shrimp, you can't just multiply everything linearly, or you'll end up with too much sauce.
Scaling Down (Half Batch) Use a smaller 8 inch skillet. Reduce the cooking time by about 20% since the pan will heat up faster. Use 2 tbsp of butter instead of 4.
Scaling Up (Double or Triple) This is where most people fail. Do NOT put 3 lbs of shrimp in one pan. They will crowd, release water, and steam. Work in batches. Sear the shrimp in two or three turns, then make one large batch of sauce and toss all the cooked shrimp back in at the end.
For spices and salt, only increase to 1.5x the original amount; you can always add more at the end, but you can't take it away.
Debunking Shrimp Myths
There are a lot of old wives' tales in the kitchen. Let's clear some up.
The "Seal in Juices" Myth: Many people think searing "seals" the meat. It doesn't. Moisture loss happens regardless of the sear. The high heat is actually about creating flavor through browning, not locking in liquid.
The "C Shape vs O Shape" Rule: You've probably heard that shrimp are done when they form a "C." While generally true, the "O" shape (tight curl) is the definitive sign of overcooking. Aim for a loose "C" and pull them off the heat immediately.
Storage and Reheating Tips
Shrimp don't handle reheating well, so it is best to eat these fresh. But if you have leftovers, here is how to handle them.
Fridge Storage Store in an airtight container for up to 3 days. The sauce may solidify in the fridge, which is normal since butter hardens when cold.
Freezing Guidelines I don't recommend freezing cooked shrimp in butter sauce. The texture becomes grainy and the shrimp get rubbery. If you must, freeze them for up to 1 month, but expect a quality drop.
Reheating Method Avoid the microwave if possible. Instead, place the shrimp in a skillet over low heat with a teaspoon of water or extra butter. Heat just until warm. Overheating them again will turn them into rubber.
Zero Waste Tip If you bought shrimp with the shells on and peeled them yourself, don't throw the shells away. Toss the shells and heads into a pot with water, an onion, and a carrot. Simmer for 20 minutes to make a quick seafood stock for risotto or soup.
Serving and Plating Guide
Because this is a 10 Minute Sautéed Shrimp with Garlic dish, you want the presentation to look effortless but clean.
The Plating Secret Use a shallow bowl rather than a flat plate. This keeps the garlic butter pooled around the shrimp rather than spreading thin. Pour the sauce over the shrimp first, then sprinkle the fresh parsley on top at the very end for a pop of bright green.
The Finishing Touch Serve with a few fresh lemon wedges on the side. A final squeeze of fresh lemon right before eating wakes up the butter and makes the flavors snap. If you want to be fancy, serve it with a side of toasted sourdough bread to mop up every drop of that garlic butter.
Recipe FAQs
How long do you sauté shrimp in butter and garlic?
Sauté for 3 minutes total. Sear the shrimp for 2 minutes on one side, flip and sear for 1 minute more before adding the garlic butter sauce.
How do you cook shrimp for 10 minutes?
Combine 5 minutes of prep with 5 minutes of active cooking. This allows time for seasoning the shrimp and the fast paced searing and saucing process.
Is it better to sauté shrimp in oil or butter?
Use a combination of both. Vegetable oil handles the high heat needed for the initial sear, while butter provides the rich flavor for the finishing sauce.
How to make your shrimp juicy?
Remove the shrimp from the pan immediately once they turn pink and golden. Overcooking is the primary reason shrimp become rubbery and dry.
How to cook shrimp for diabetics?
Stick to the fresh ingredients listed. This recipe is naturally low-carb and sugar-free, focusing on lean protein, healthy fats, and lemon.
What are some great sides for this dish?
Serve with steamed broccoli or a fresh garden salad. For another nutrient dense option, the tahini dressing in our Vegan Buddha Bowl offers a complementary creamy texture.
How to store leftover garlic shrimp?
Place in an airtight container in the fridge for up to 3 days. The butter sauce will solidify when cold but will melt again during reheating.
Sautéed Garlic Shrimp in 10 Minutes